It’s cold.
I have no excuse other than it’s been cold and rainy here. I thought we would have some awesome places for an indoor shoot, but other things came up. Soooo…ready for something a little different?

As I mentioned in my last blog post, Nigel and I live in a cookie cutter house. It’s an open concept (which I personally dislike) with five or six rooms on the first floor and six or seven rooms on the second. You’re probably asking yourselves why I don’t know how many rooms are on each floor, right? I’m not sure if you count the master bathroom and powder room/mudroom as separate rooms. And, then figure in that open concept, and I have to wonder if the kitchen, morning room, and living room count as three rooms or just one big room! See my dilemma! Our first floor has a front room/office with French doors, and then is the dining room. These are off of the hallway shown in my last post (here). The kitchen and living room are at the back of the house with the morning room off of the kitchen.
I really wish my kitchen were a separate room. Not that we’ve had much company in the last years (or ever if we exclude family as company, and I do) but I want my kitchen clean. I don’t like looking over and seeing dirty dishes on the counter. I rarely use the dishwasher because we run out of clean dishes before the dishwasher is full! Am I the only one who feels this way? I am? OK…let’s go on!
Color!
When we moved into this house, I was determined to keep it white for a long time. You see all of those gorgeous white houses with little accents of color here and there. Yeah, that lasted for less than three months at Casa Middle! I think we painted the living room (some may call it the family room) first. We painted it Sherwin Williams Sea Salt. My daughter had painted her dining room the same color. Here’s a fun fact. We have the exact same floor plan with a few differences. Her house is an older model so her kitchen is a different configuration. She has a loft upstairs where we have a fourth bedroom. Anyway, I saw this color and thought it perfect for the living room. Nigel and I slapped on a couple of coats. On second thought, it may have been my daughter and me because Nigel had broken his arm by that time (read about that here). We put up the pictures, hung the curtains, and voila! Living room is done, right? Wrong! I hated the color. I had completely forgotten to figure in the lighting! Our daughter’s house sits catty-cornered on her block so her dining room receives pretty indirect light. Our living room receives direct light from the west. That sea salt color was too nursery blue for me. It took me a couple of years to convince myself to tell Nigel I hated the color! Now, it’s Sherwin Williams Ancient Marble. It just so happens the front room as well as the upstairs bathroom is the same color. And, it looks different in each! But, I digress as always!
In short order, every room in the house had been painted. I ended up with a palette of muted sage greens and ivories, something I’d never had before. Believe me when I tell you my houses have “worn” many different colors over the years. Our last master bedroom was eight or nine colors (including wallpaper) in the 25 years we lived there! We have always done our own painting and woodwork. I find an idea, and Nigel puts it into reality! I cannot remember what color the dining room was in the picture above. I made those curtains, but they now hang in my daughter’s front room!
It’s DIY time!
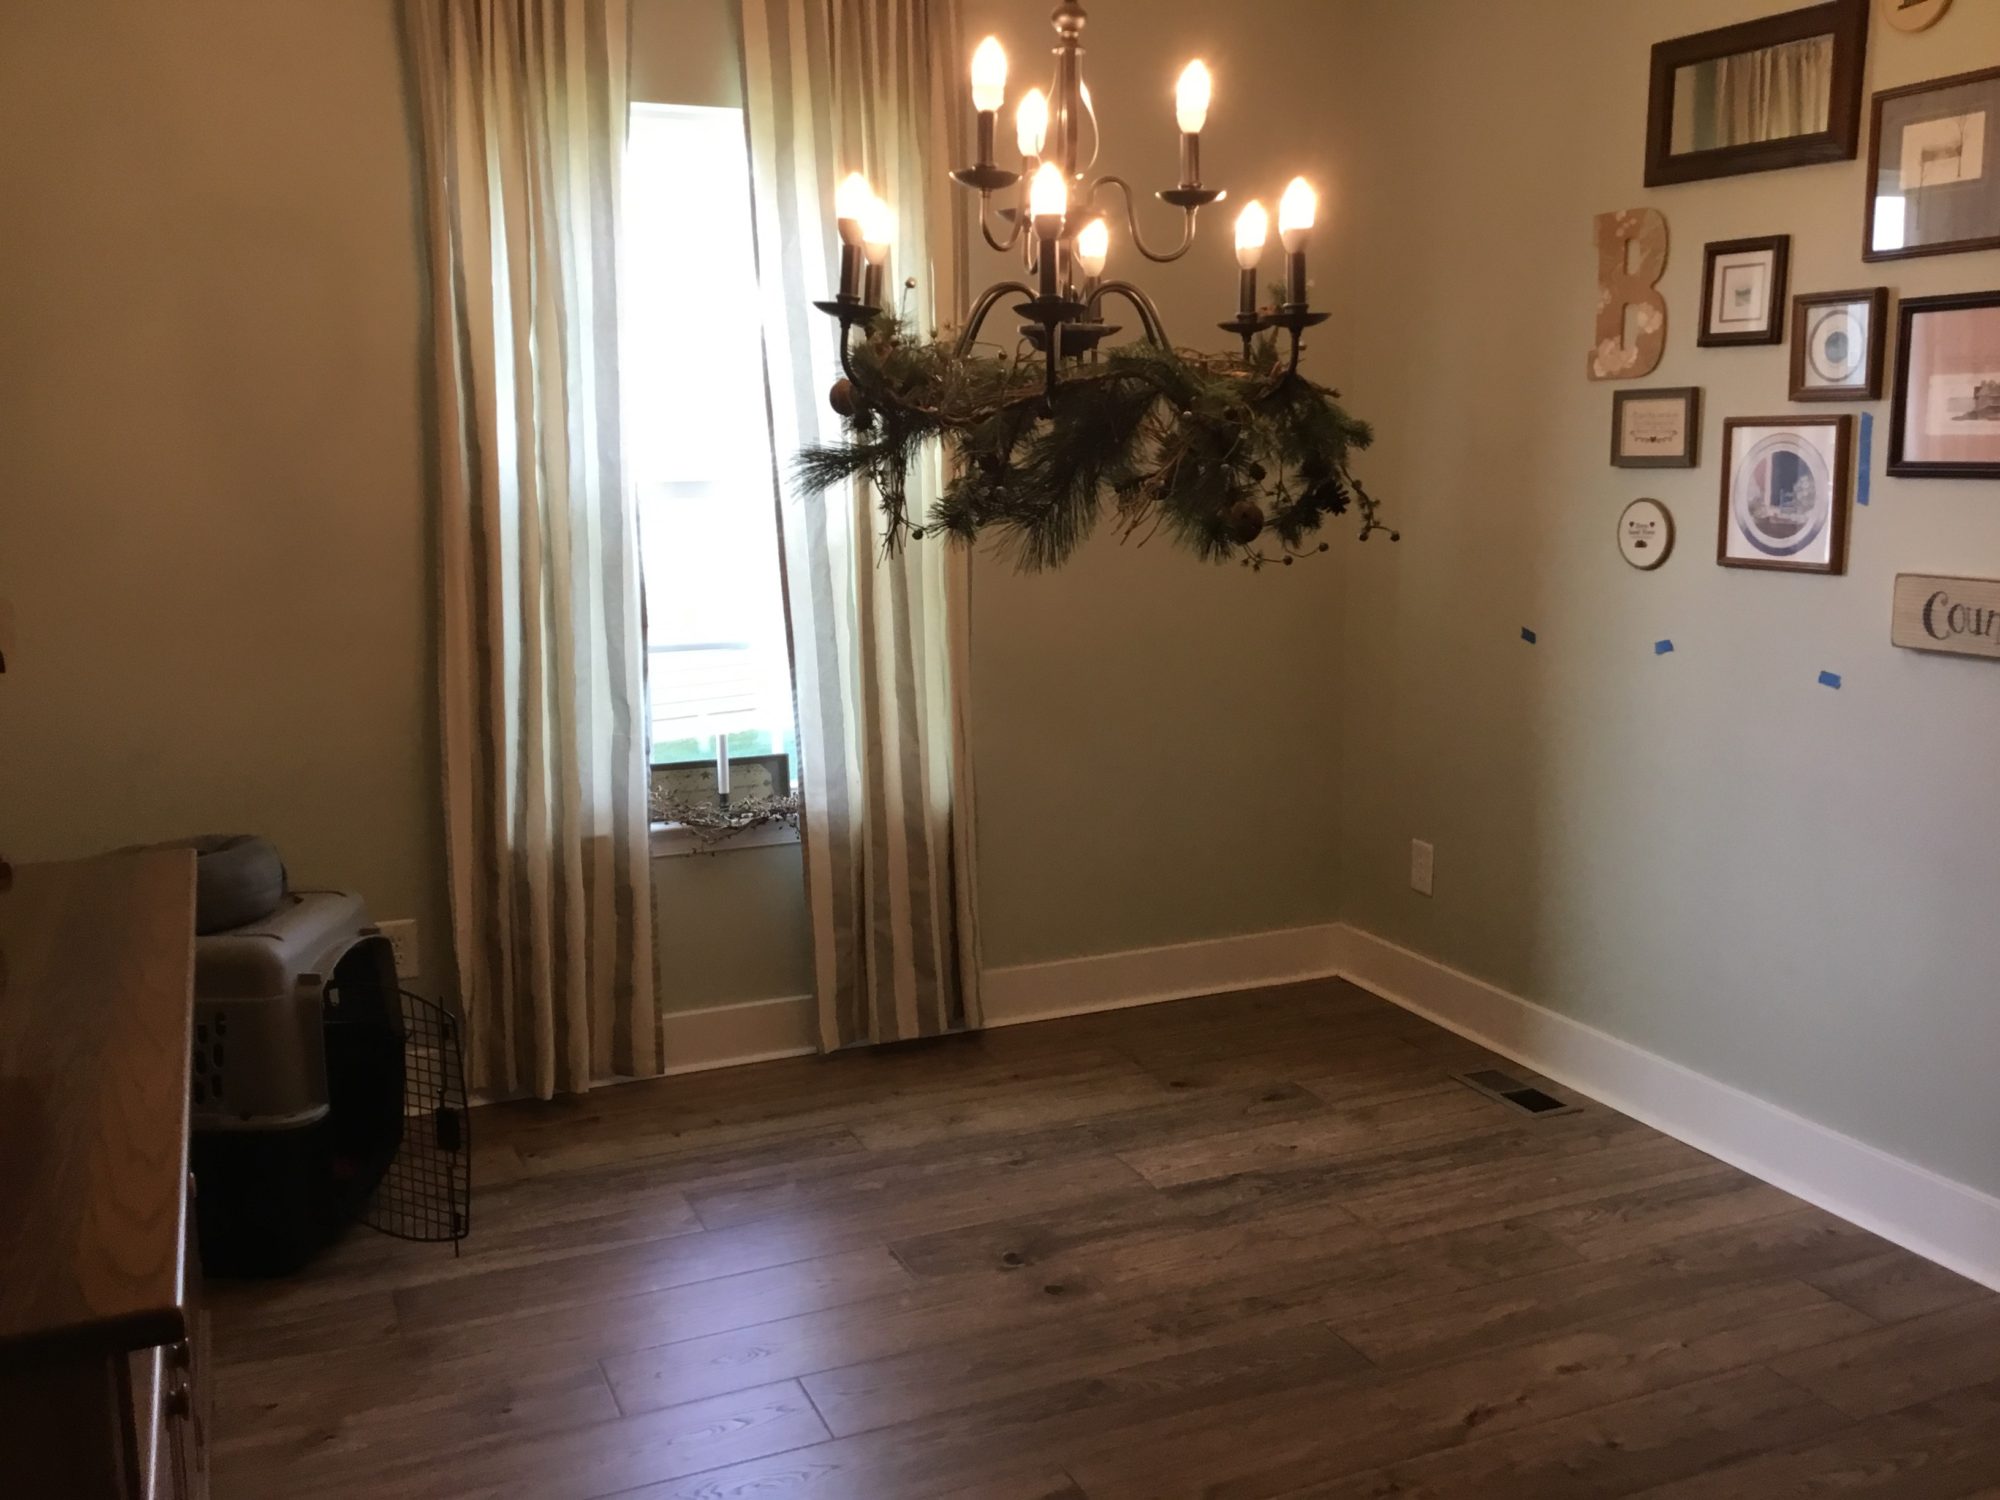
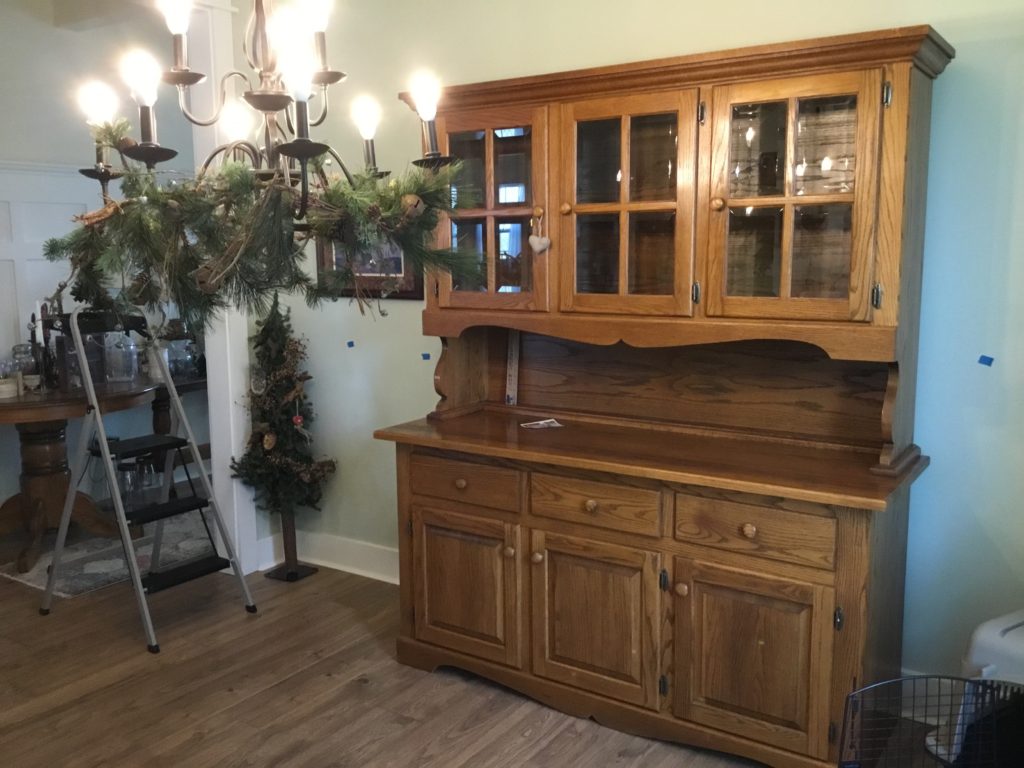
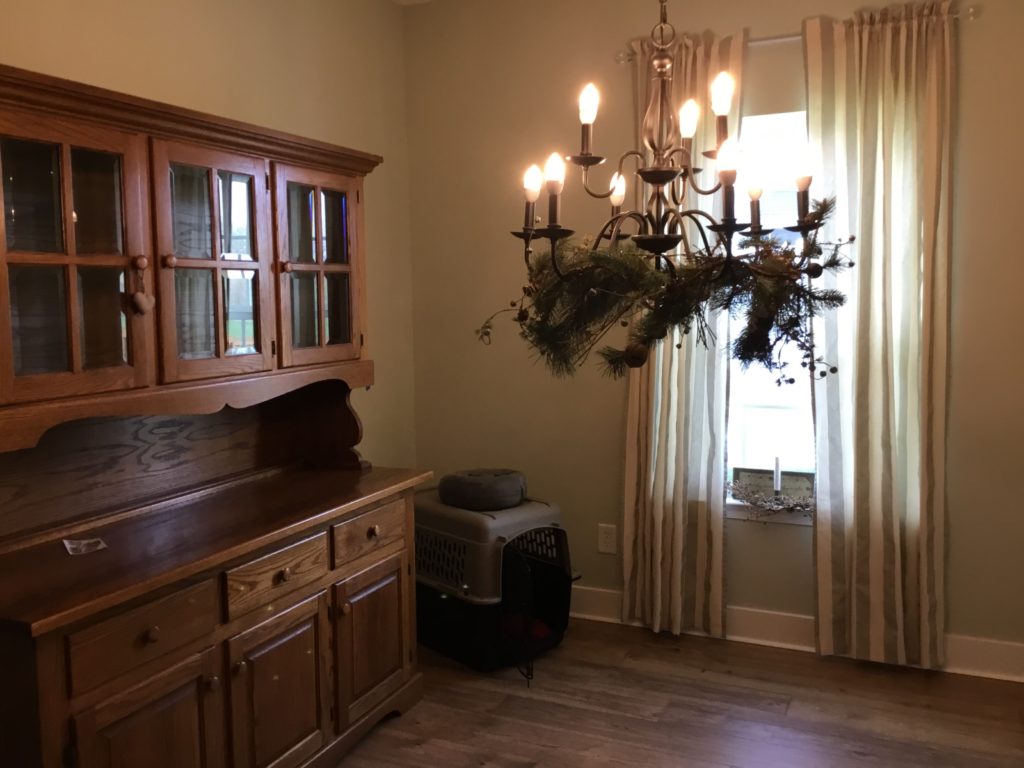
I finally convinced Nigel the dining room needed some sprucing up. See that hutch up there? The bottom of it is stuffed with Christmas and other decor I am not currently using. Beyond that, it is solid oak and was custom made in Tennessee over 25 years ago. It is two pieces as most hutches are. And, it is heavy! Nigel kept putting me off because he didn’t want to move the hutch yet again. Notice the flooring? We put that down (Nigel, our oldest son, and me) right before Covid shut the world down. It’s a premium laminate flooring, and I love it. Since we had just (in Nigel’s eyes, not mine) moved the hutch, why would we move it again? Because I had a plan! Nigel, grown bored with Covid life, agreed to my plan.
Step 1
First, we had to pick out paint. For the most part, Nigel leaves these decisions to me. We had redone the kitchen and mudroom a couple of years ago. We used Sherwin Williams Svelte Sage for those rooms as they are adjoining the living room. Svelte Sage is the darkest color on the same paint chip as Ancient Marble (the living room color). When it came to the dining room, which is adjacent to the living room, too, but is separated by a wall, I decided to go with the middle color, Modern Safari. The white color is Sherwin Williams Alabaster. We buy our paint at Lowes and have found their Sherwin Williams to be just as good as the Sherwin Williams paint at the actual Sherwin Williams store (boy, that’s a lot of Sherwin Williamses!). All of the woodwork and trim is painted Alabaster in our house as is the wall I showed you in the last post.
Step 2
Next, we had to remove all of the stuff from the hutch. I did convince Nigel to just move the hutch to the center of the room and work around it. He wanted to take it apart and move it into another room. I didn’t want the bother of finding someone to help us lift the top off and then back on as well as mess up more rooms than necessary. What you didn’t see in any of the pictures is all of the stuff on top of the hutch as well! I collect Christmas cookie jars (random factoid). You can see some of them in the above picture.
A brief glimpse of Nigel! 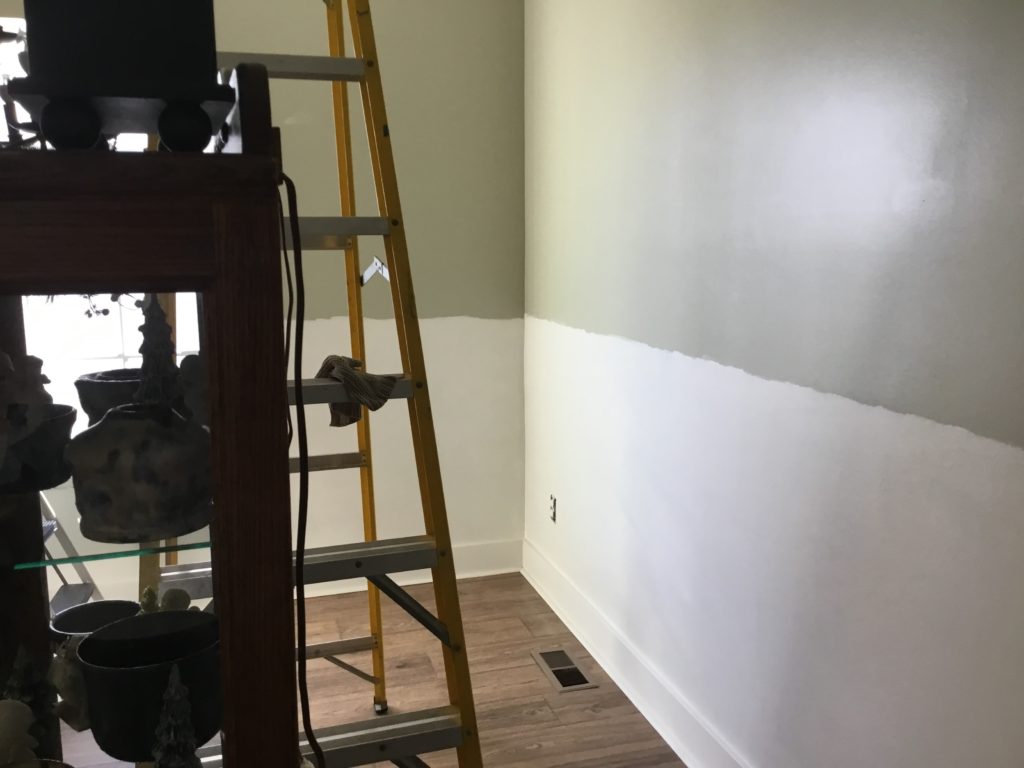
Step 3
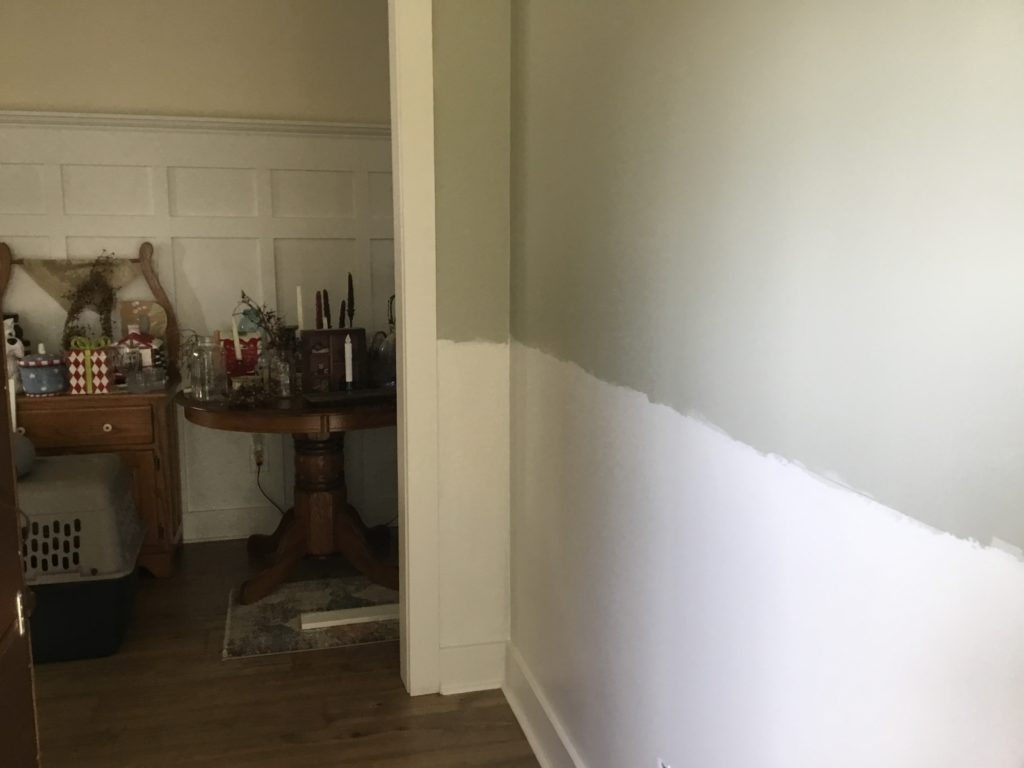
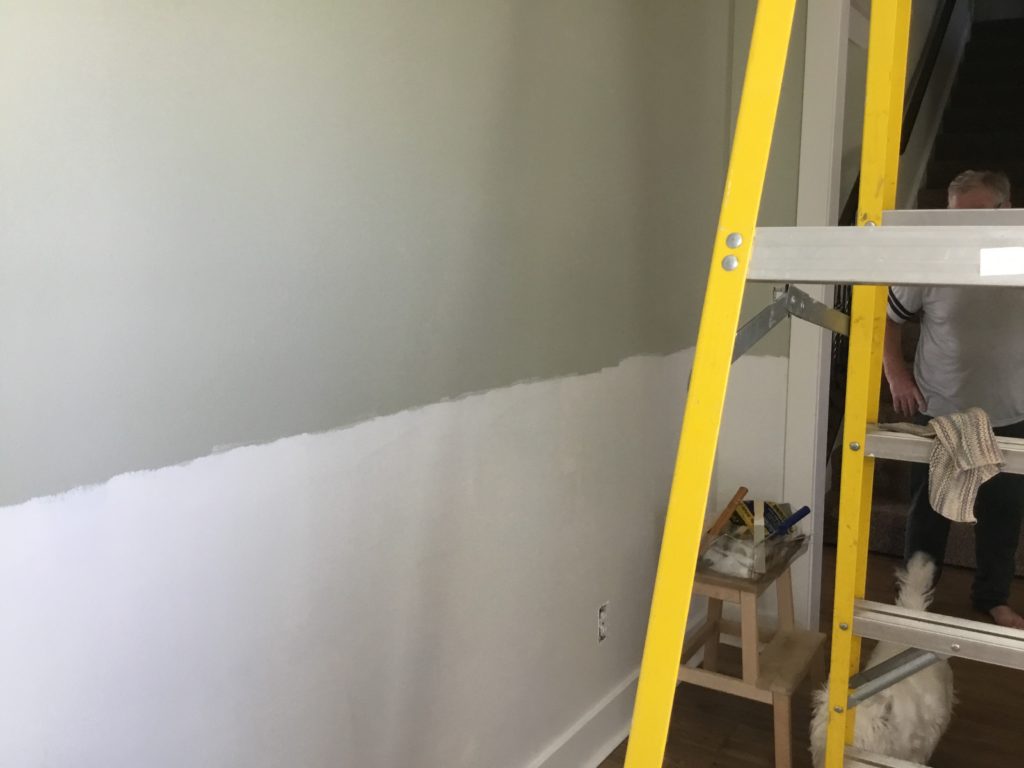
We primed the walls with some kind of primer (if you really want to know, just leave me a comment). Nigel decided we were going to paint this room differently. We were going to do one wall at a time rather than painting the entire room. In other words, I would do the cutting in at the ceiling; we’d paint the wall. Then, we would move on to the next wall. Usually, I would cut in all around the room and then paint. I don’t know if this “new” way worked better or not. Nigel was happy with the result so I’m good with that.
Step 4
Nigel had already done the Craftsman style casing around the window and doorway three or four years ago. I don’t know about any of you, but I love to look at listings on Realtor.com! I had found exactly the look I wanted for the dining room. Unfortunately, I deleted the picture so I can’t show you my inspiration picture. My original intent had been to paint the Alabaster up to the top of the bottom window. As this wainscoting treatment would mimic what we’d already done in the hallway, I didn’t want it to be an exact copy. Eventually, financial considerations won out! We could get the length we needed from a single board if we only made the stiles three feet high. With the additional inches provided by the floorboards we ended up about thirty-nine inches off the floor. The ceilings are nine feet high so this proportion worked well. If we’d gone as high as I’d originally wanted, we would have ended up with a 50/50 proportion. I knew that would bug me eventually!
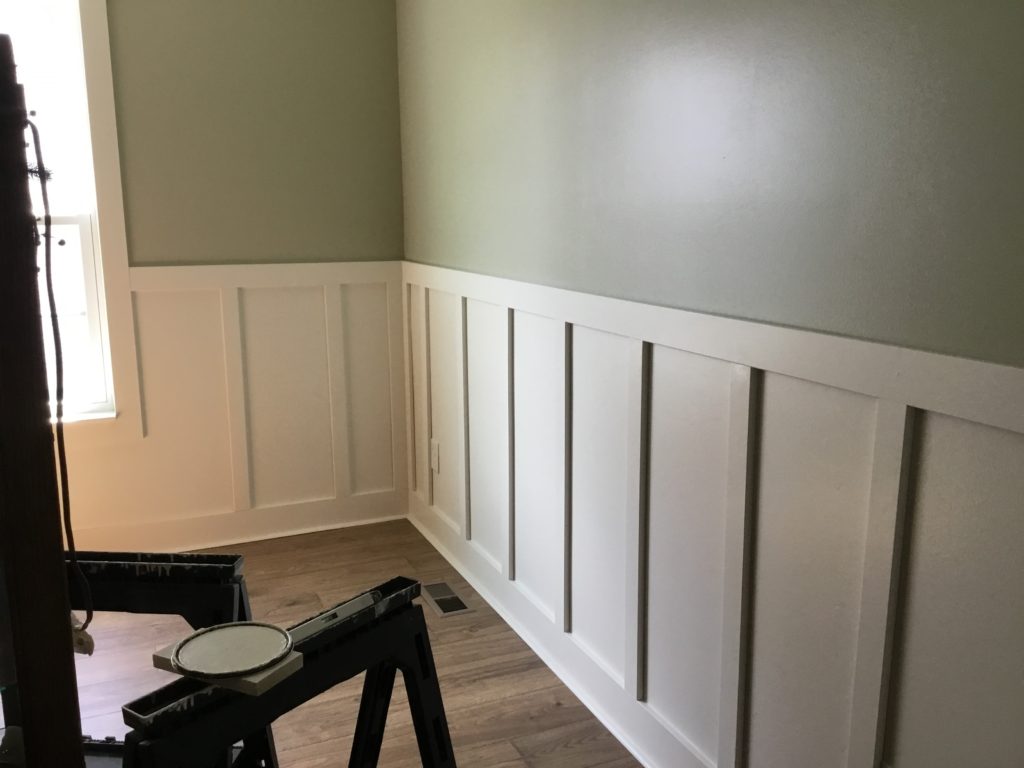
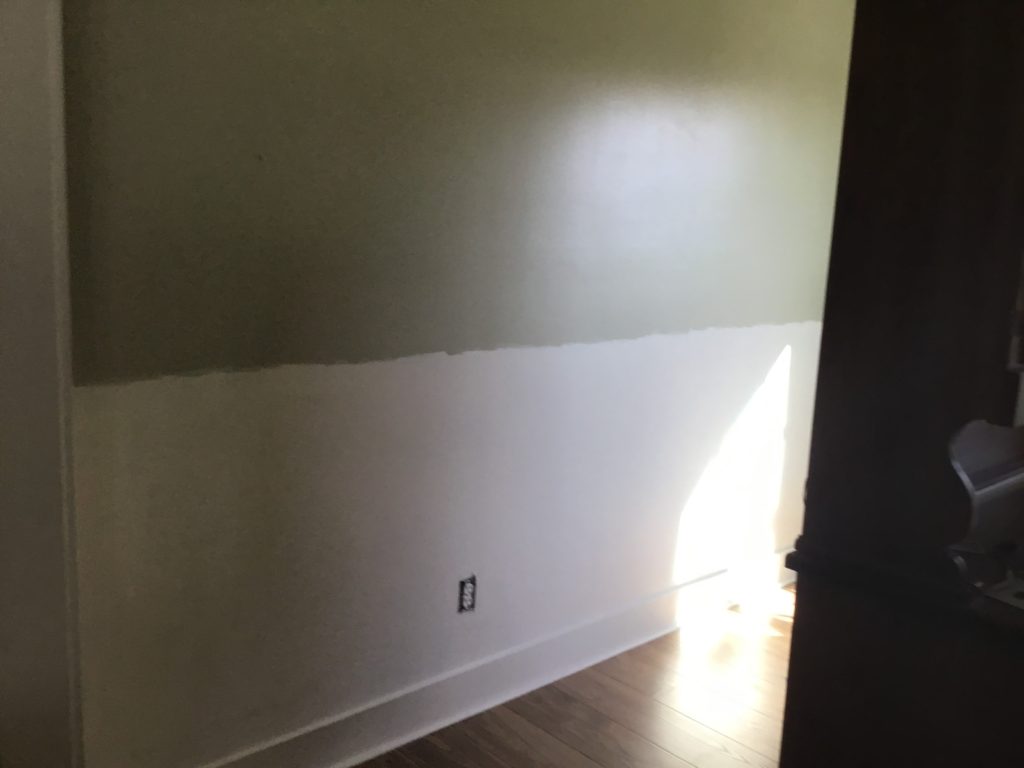
We nailed the horizontal board to the wall first. It had received three coats of paint already. We used the already extant floorboard. The stiles were then placed in between the two horizontal boards at sort of the same distance. We had to take into account where electrical outlets were as well as studs. I am wicked good with a stud finder (pun intended)! As with all of Nigel’s projects, a level was used (I know that’s passive voice, and I’ll get a ding for it when it comes to publishing this!), and everything was as level as it could possibly be in a humanly built house! Oh, I’m loving this so much even at this unfinished point! Another useless but fun fact: the salesman for the neighborhood (which is now fully built so he was out of a job) stopped by. He’s now a realtor and promptly informed us wainscoting was out! I don’t care! It’s “in” at my house! Once I figured out what it was, I’ve realized Craftsman style is my style with a little primitive thrown in!
Step 4…oops…5

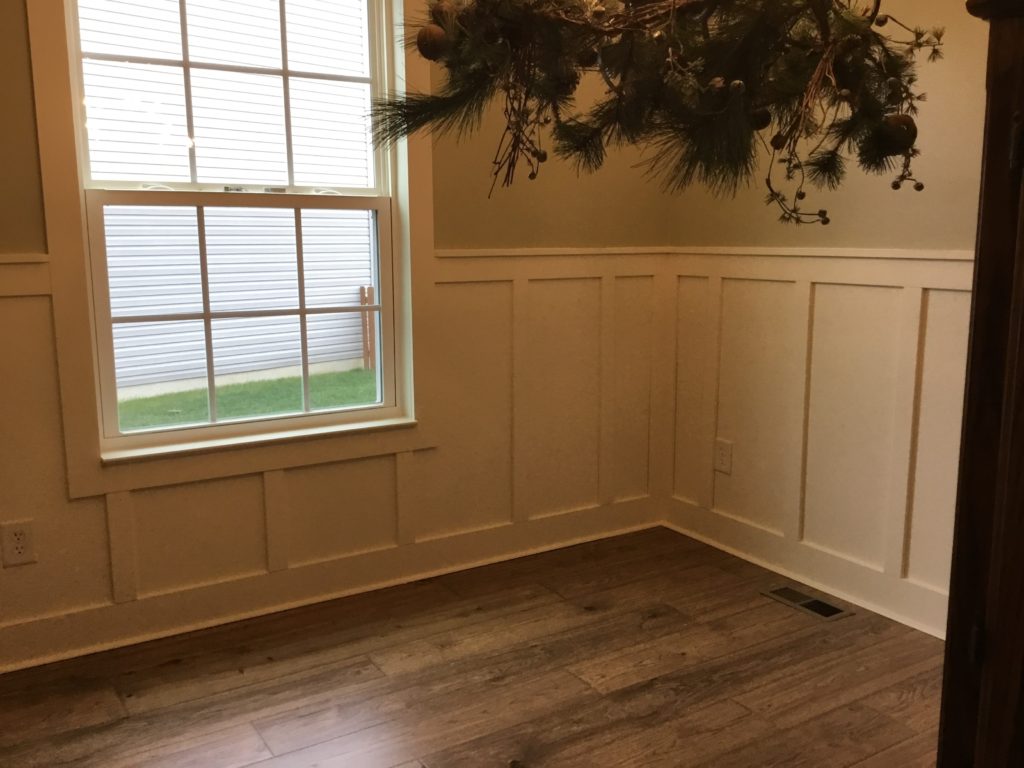
That greenery stays there all year! 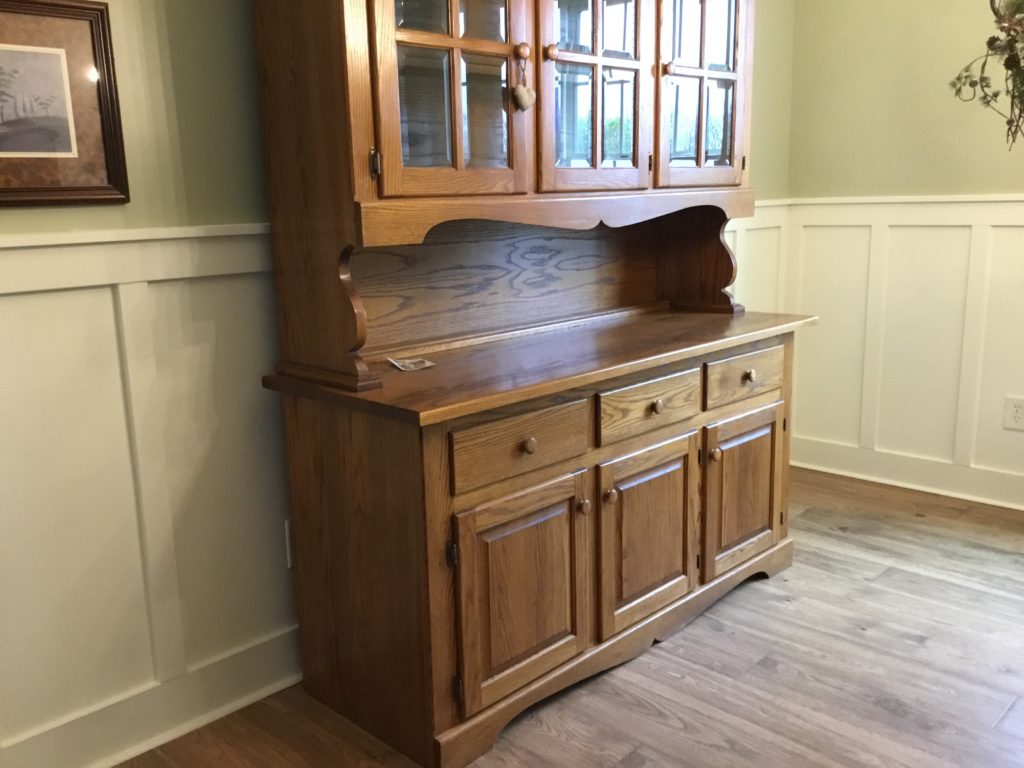
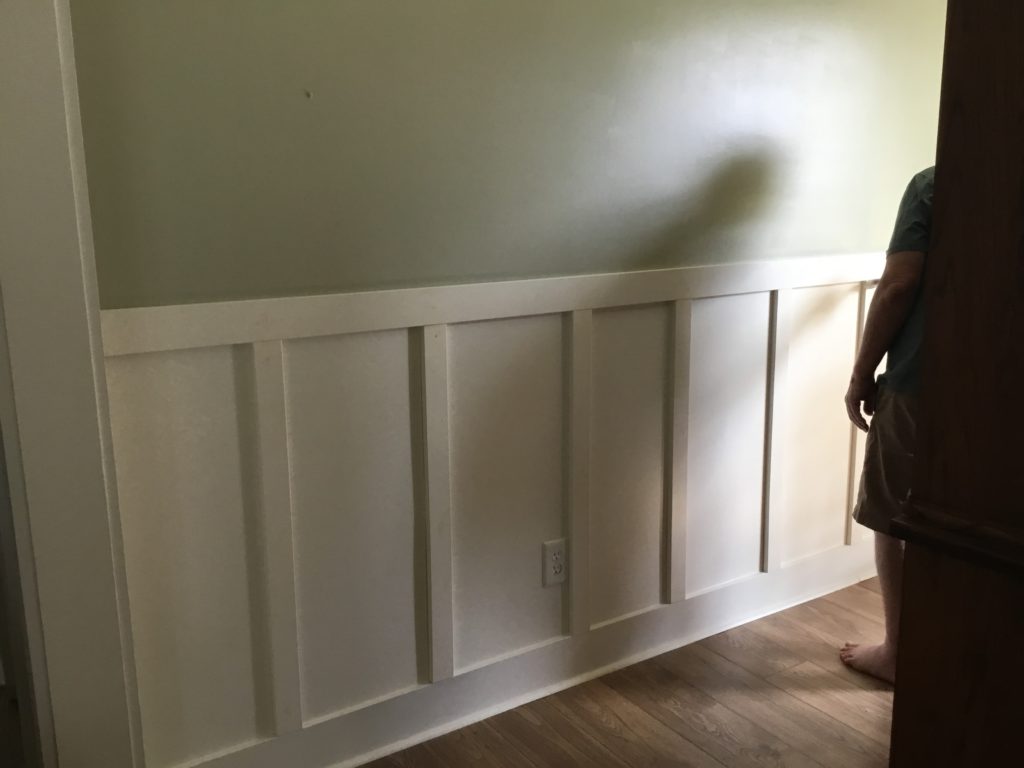
The dining room is not an overly large room. When you add in the hutch, the space gets even smaller! Unlike the front hallway treatment, we knew a shelf would not work in the dining room. Nigel fretted over that for a bit. I assured him a small three inch board would more than finish the wainscoting and not intrude too far into the room. Then, he worried about the corners…that’s what happens when your photographer is left brained and a former engineer! He ended up mitering the corners and filling the gaps with some kind of goop! We finished with two more coats of paint on the bottom and a few touch ups on the top!
The Reveal!
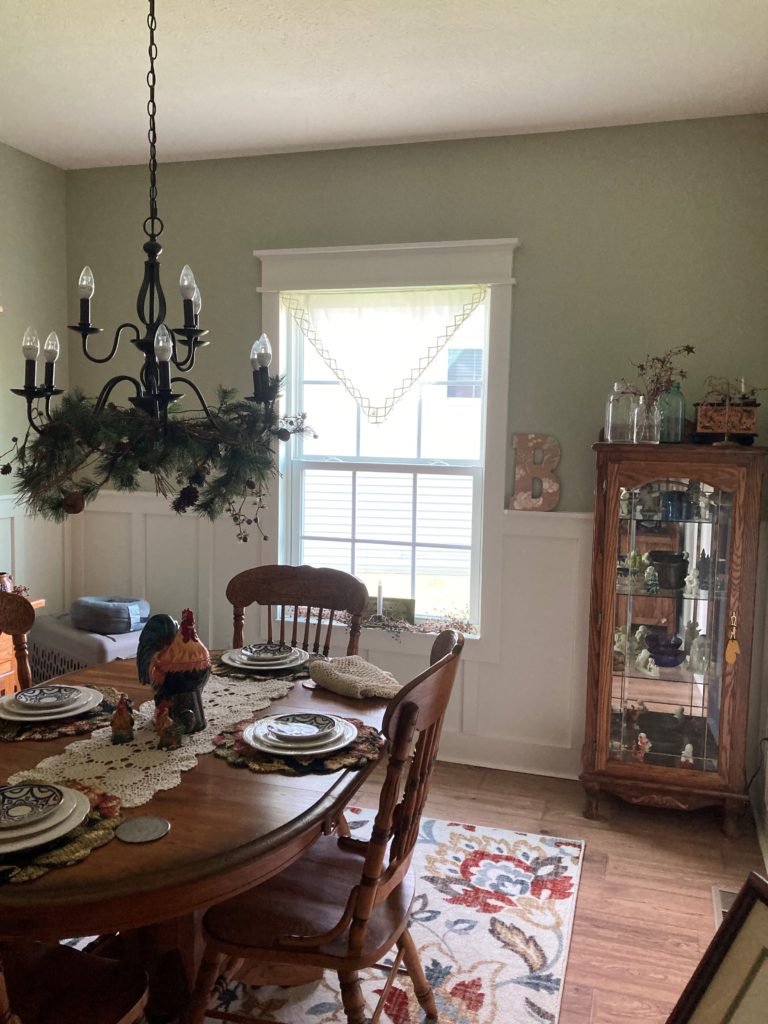
I love roosters, but these are the only ones I have. 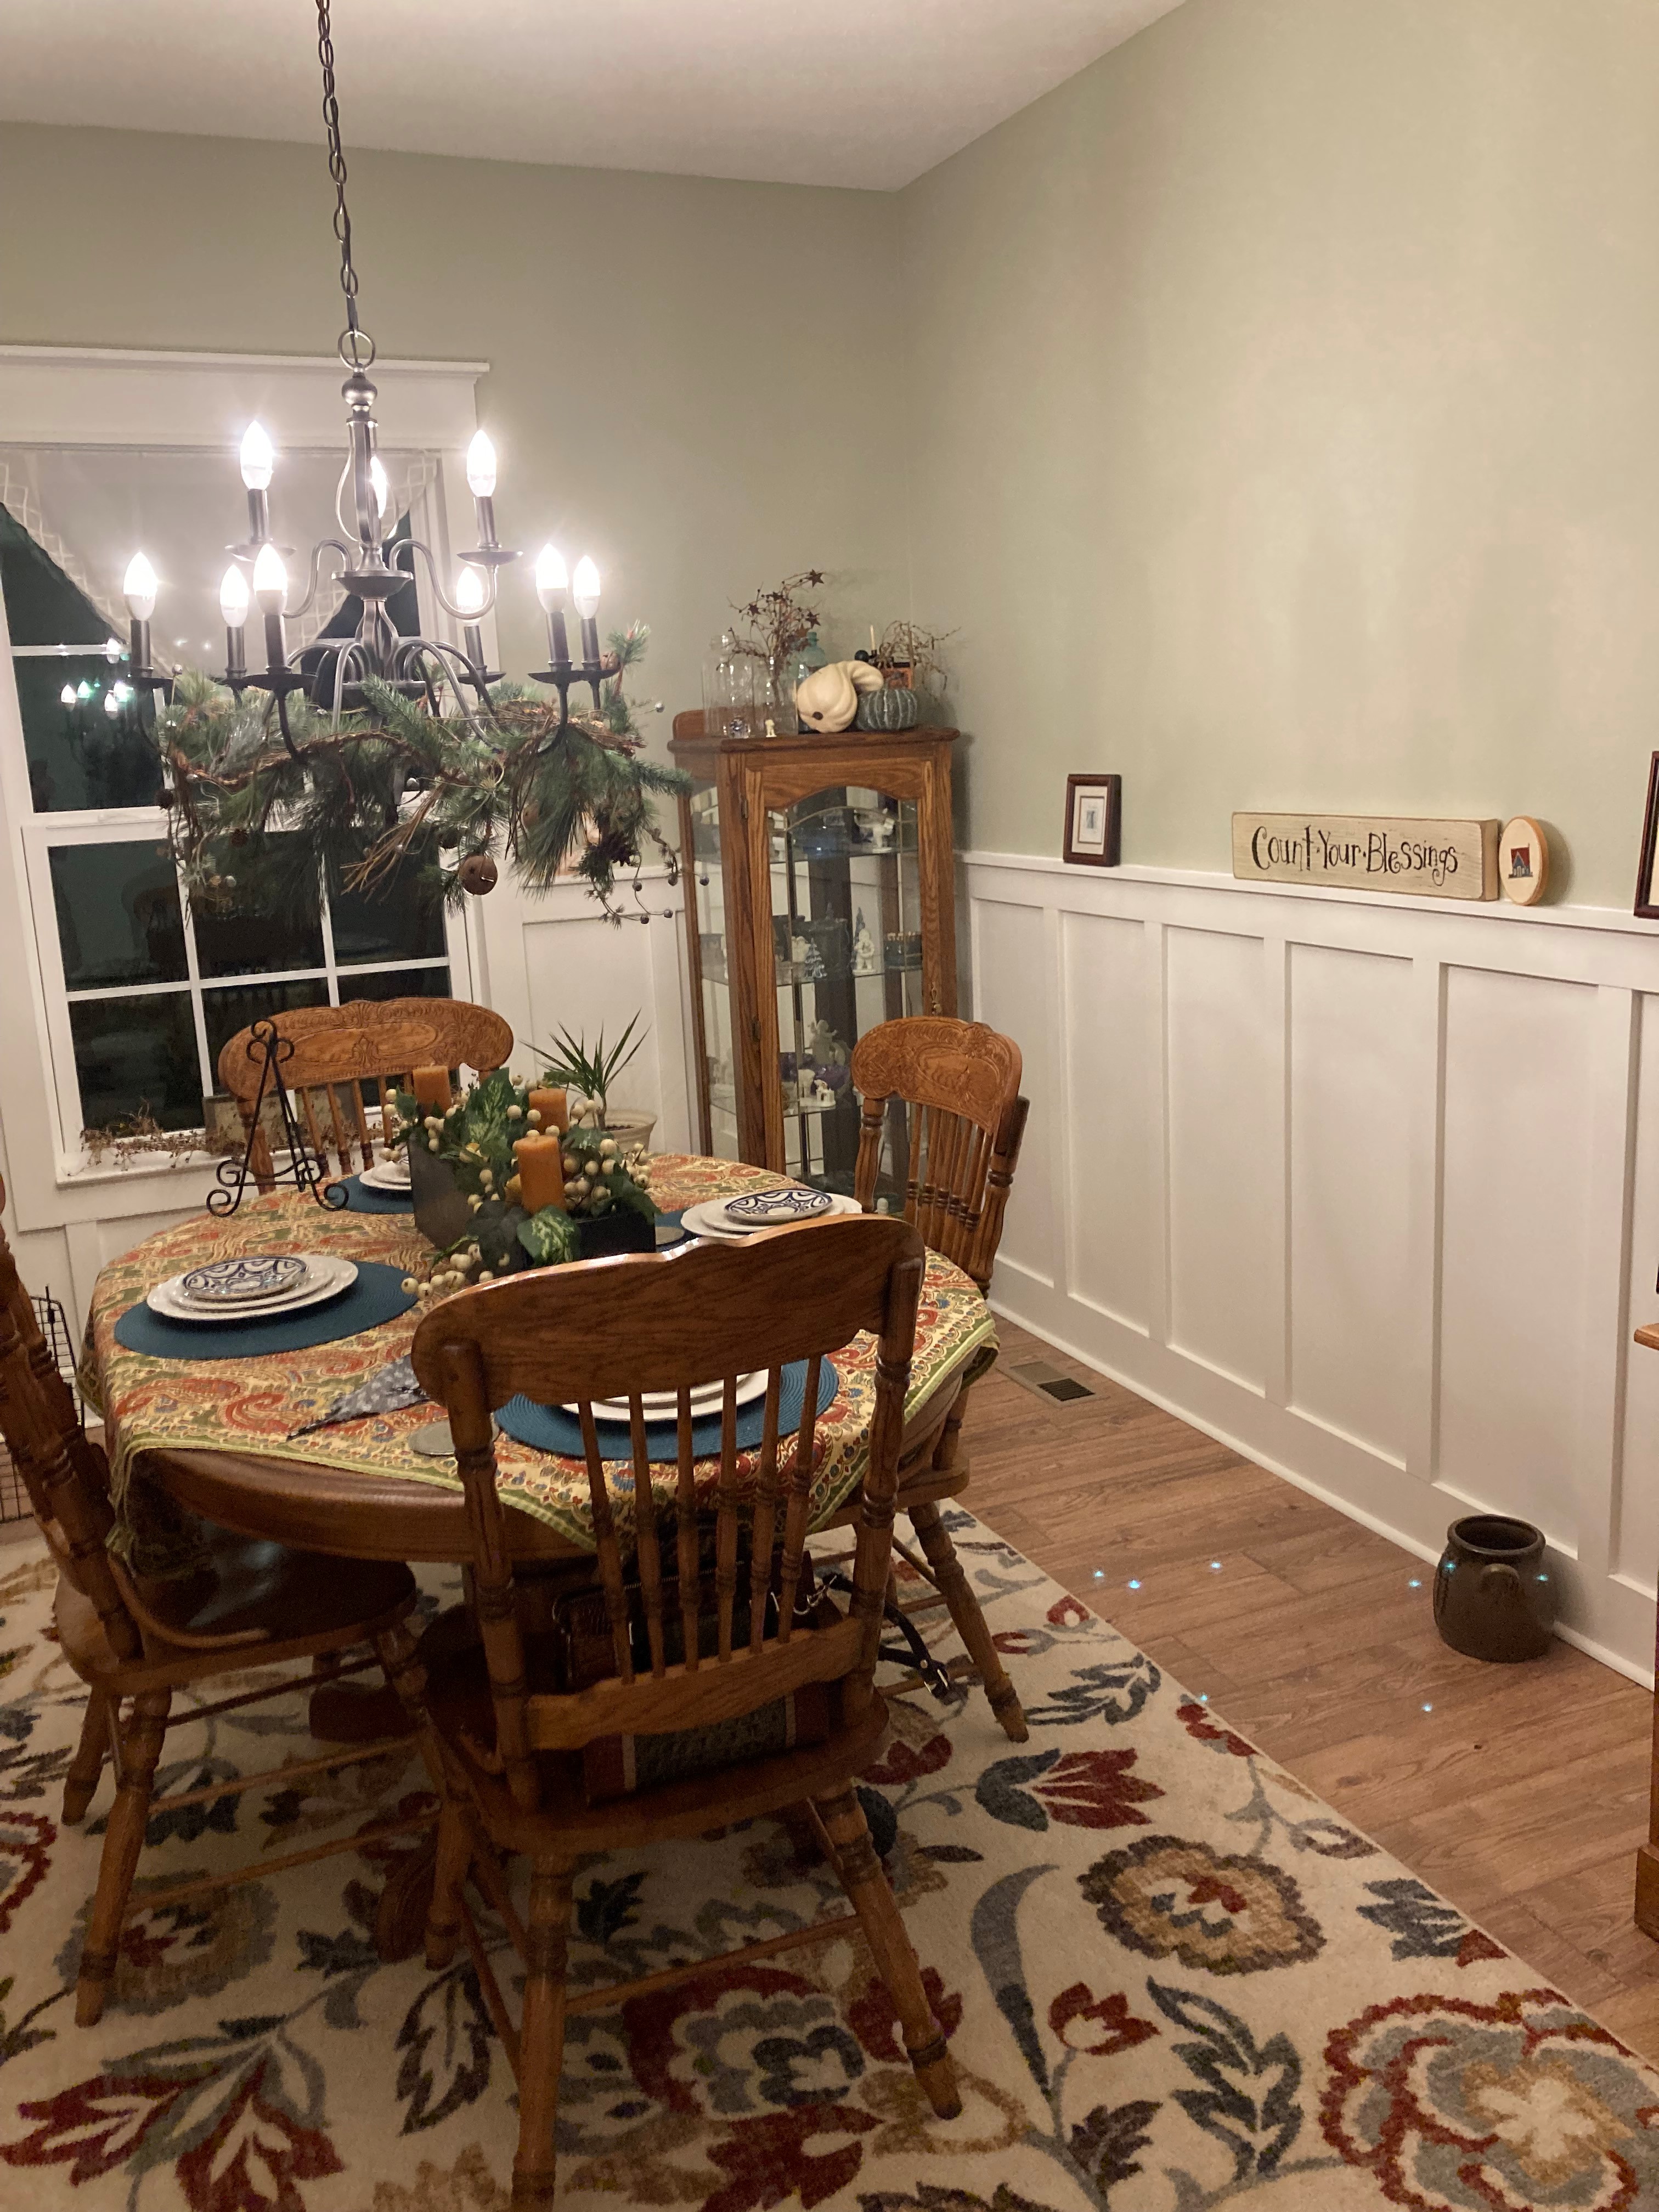
See those little blue spots…those are lights reflecting off of the chandelier! I’m not the greatest housekeeper, but I’m not that bad!
I am one of those crazy people who keeps the table set all of the time! And, I change out place settings, table linens, and other things with the seasons. The picture on the left is from this summer. The one on the right is the way it looks right now. Before the renovation, the wall on the right side of the pictures was a gallery wall (you can see a bit of it above) full of D. Morgan prints, cross-stitched (by me) pictures, and other types of media. After, I just liked the look of the bare wall. Nigel stuck that little plaque up on the shelf and the big “B” by the window. I made the big “B” by covering a large cardboard letter with a piece of wallpaper sample. Here’s a DIY/crafter tip…go to your local wallcovering place and ask for old wallpaper books. They’ll be glad to hand them over, and you will have lots of different papers to use for whatever you want! The window covering is an small tablecloth folded over a spring tension rod.
The Lewk!
Ok, no looks to be reviewed here! This dining room has probably always been the closest to my personal decorating style. I love primitives, but I’m just not any good at decorating with it. I love those primitive willow trees as well as Ball jars. I have a friend who excels at this kind of decorating. Her home could seriously be in a magazine. It is just that perfect!
Wrap it up, Marsha!
I hope you enjoyed this little look at a DIY project at Casa Middle. Start to finish, this was one of our shortest projects. It is not unusual for a project to take several weeks. Not counting the days it took to paint the boards and let them dry between coats, this project lasted for about three days. And, with that, our house has been totally DIYed. The only things I’d like to do would be to replace the floor tile and shower tile in the master bedroom (it’s the same brown tile in both places), get rid of the soaking tub (I haven’t taken a bath in more than four decades), build out a window seat in its place with some additional storage or shelving, put crown moulding up in at least the master bedroom (and other rooms), and maybe build one of those cute locker type things in the mudroom. That’s not too much to ask for, is it? So, what did you think? Do you enjoy DIYing? What’s your best or worst project? Please let me know what you think. I’d love to have a conversation with you! And, if you enjoy my blog, won’t you consider subscribing? Thanks so much for reading. I do truly appreciate all of you!
That looks beautiful! I too tend to change paint colors in our rooms fairly frequently and tend to stick to tones of blue and green. I tend to paint alone so I like to alternate cutting in with rolling and will usually do one wall at a time slowly working my way around the room and if I’m not totally wiped out by the time I get back around to my starting spot it’s usually dry enough that I can start right in on a second coat (if needed).
I love to paint! Nigel…not so much! I have to convince him to make the change, then I have to figure out what color I want to change to! Such a process, right?
Thanks, Joanne!
Your wainscoting came out beautifully! You may be one of those crazy people that keeps your dining room table set all the time, but I’m one of those crazy people who considers a dining room a terrible waste of space since we also have a breakfast nook. Our formal dining area is now called the morning room. LOL!
Michelle
https://mybijoulifeonline.com
You know what’s funny? We have the “formal” dining room as well as a morning room (which should probably be called an evening room since it’s on the west side of the house! Our “good” dining room table (which is a harvest table) was too big for the dining room. It was custom built to go with the hutch. It was in our dining “area” at our old house which was really just an extension of the kitchen (but not a breakfast nook). Anyway, that table is in the morning room along with the buffet that was in the dining “area” at our old house. And, then we have a huge island in the kitchen. Guess where we eat? At the island, of course! Both tables are always set. It’s just part of the decor and part of my creative life, I guess! This is the first house we’ve lived in with a true dining room. It, along with the front room, are just wasted space in my eyes. I wish we could figure out a way to make a master bedroom suite downstairs without it looking like we did that. We made a hasty decision to buy this house and have regretted it for quite some time.
Well, that was a long reply, right?
This is looking so beautiful! It came out to be just amazing! Lovely Post dear! xoxo
Allurerage
Thetrendybride
Thanks so much!
I love the wainscoting Marsha whether it’s in or out. It’s just like how we get dressed, it’s our personal style so that’s what’s important.
We need to add some paint to our house. It’s usually a summer activity here in AZ (when it’s too hot to be outside) so we will have to plan it for next summer.
XOXO
Jodie
http://www.jtouchofstyle.com
Thanks, Jodie! I agree. I have never really followed trends in home deco…except for shiplap…I loathe shiplap! I had a red dining room long before that was the trend. In fact, we painted it just as it was coming into style! We paint year round…I think I enjoy it most in the cold months because something about painting makes me “glow”!
Thanks for coming by!
The wainstcotting really makes the room for me! I love it! I also brightens the room and makes it look more modern and large in my opinion.
http://www.chezmireillefashiontravelmom.com
Thanks, Mireille! I love wainscotting anyway. It only took 6.5 years to convince Nigel to do it! I think it really brightens the room!
Thanks for coming by!
I love the changes you made to the dining room! The waintscotting looks amazing. Thanks for sharing the transformation!
https://www.kathrineeldridge.com
Thanks, Kathrine! I think it’s one of my favorite projects so far! It was definitely the fastest!
Thanks for coming by!