
I know, I know! You don’t expect to see DIY from me. I’m not just a pretty face! I’m actually pretty good at coming up with ideas (or at least I have some pretty wicked Pinterest pages) and visualizing how it will look in our space. I’m also a pretty good supervisor as well as assistant. The difference has always been that Nigel is the person carrying out the plans. This reno was my baby from start to almost finish! And, Nigel absolutely hates that he’s been relegated to supervisor.
A new home…
I wasn’t in love with our last home down here in Central Indiana for a while. But, after we’d put our stamp on it (Craftsman moldings, new floorings, beadboard, pine siding, new kitchen cabinet colors), I loved it! It was bright and airy, big enough for lots of escape places, and had lots of storage. You know what an escape place is, right? It’s a room, alcove, or even a bedroom where you can get away and just spend some time with yourself. The problem with this beautiful home? All of the bedrooms and full bathrooms were on the second floor. During the pandemic, Nigel fell down the stairs and broke his other ankle. Yes, the man actually broke both of his ankles in the time we lived in that house!
A curse…
Just north of our house was a cemetery. It hadn’t been active (as in new graves) since the 18th century. The neighborhood had once been a farm like many of the neighborhoods in our town. This graveyard was their family graveyard. I used to joke to Nigel that perhaps, just perhaps, our house was cursed because, maybe, the graveyard had actually been larger than what was fenced in. I mean, he broke his arm and both ankles within seven years! And, he didn’t break a mirror so that wouldn’t explain it.
A hiccup…
We were going to build a different house when we first moved. The night before the house was to be started, the sales guy called Nigel and said no can do! The house was in a flood plain, and the county wasn’t issuing any more building permits until the maps were updated. The salesman had no idea when that would be. So, we could get our money back, wait it out, or buy The Big House at the end of the street. This house had gone on the market and was quite a bit bigger than we were planning to build. I jokingly named it the Big House. They offered us a substantial discount so we bought it. It was a good thing as it took more than two years for those maps to be changed. As we drove around the area, learning the layout, we noticed this little neighborhood of brick homes. I really liked what I saw, but we had already committed to this other neighborhood.
Fast forward…
I know…when do I ever fast forward! In 2021 or so, we started seriously thinking about buying or building a single story home. Nigel wasn’t keen on the idea of buying a pre-existing home for some reason. That’s usually me! So, we set up a meeting with the builder of the neighborhood. Every condo in Maple Grove is custom. There are basic floorplans, but you can move a wall here, move a wall there, here a wall, there a wall, everywhere a wall! Oops…I got carried away. The thing is you could make the home anything you wanted. We wanted a condo with a three car garage. Honestly, I wanted it because I remembered how it was up north when the Money Pit (Nigel’s 1993 Ford Ranger) sat outside all the time. Up there, though, we had a parking area for it. At this home, it would set outside, blocking one or the other of the two cars in the garage. So, a three car garage home was necessary in my eyes. One plan had one included. The others could be modified to add one. I honestly wish we had gone that route because our floorplan is a little wonky. I always say you can tell it was planned by a man!
Guess that wasn’t fast…
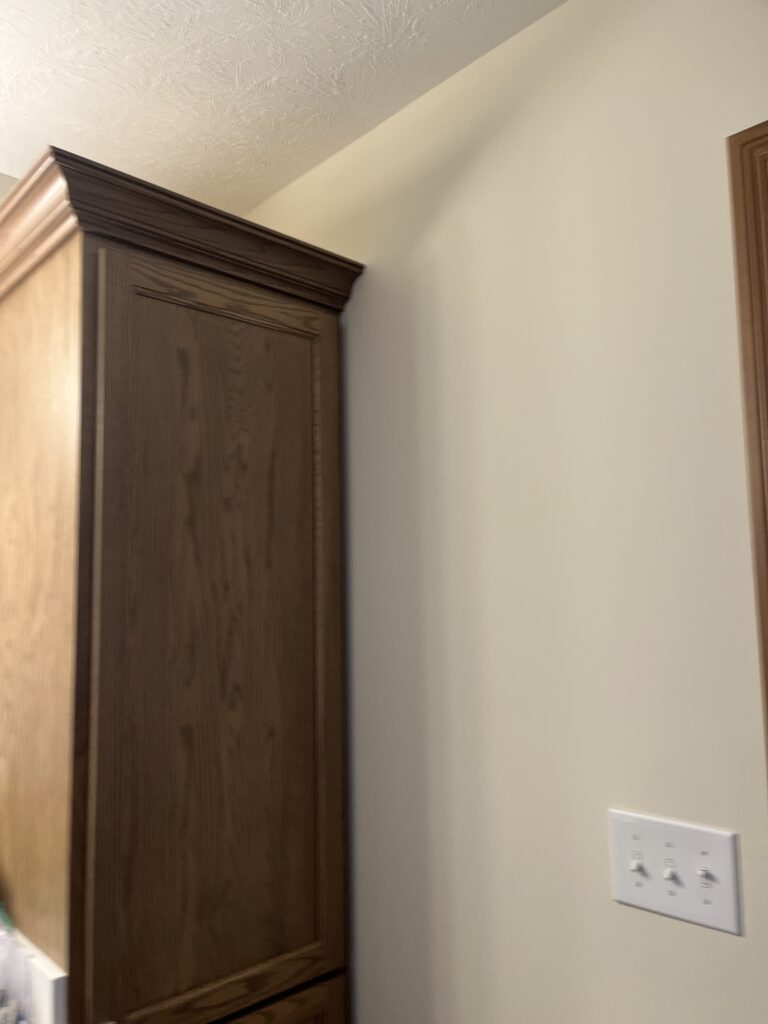
Our home is a split ranch, I think. In other words, the primary bedroom is on one side of the house while the other two are on the opposite side. In between is the kitchen and the living room. It is, unfortunately, an open concept house. I detest open concept. We could have built a wall to separate the kitchen from the living room. Remember, I said everything is custom, but everything came with a price. Well, Nigel is cheap. I know it’s hard to believe, but he really is. And, if we had built a wall there, the kitchen would be even smaller than it already is. There are two rooms in this house that are stupid big…the living room and the primary bathroom. Honestly, the living room is something like 20 ft x 20 ft but feels even bigger since it’s got an extra high ceiling and that daggone kitchen right off it as well as the dining area. The bathroom is 9 ft x 8.5 ft. There is so much wasted space in it. Some nights when I can’t fall asleep, I try to figure out how I could have made it narrower. The problem is the kitchen is on the other side of the wall. It probably could have been done, but the kitchen would have looked strange or not…I’m not sure. Also, while the neighborhood is not restricted to 55 and over, the vast majority (probably 99.9%) of the people in here are older than me! So, the size of the bathroom is probably to accommodate wheelchairs. The halls and doors are extra wide.
Finally…the bathroom…
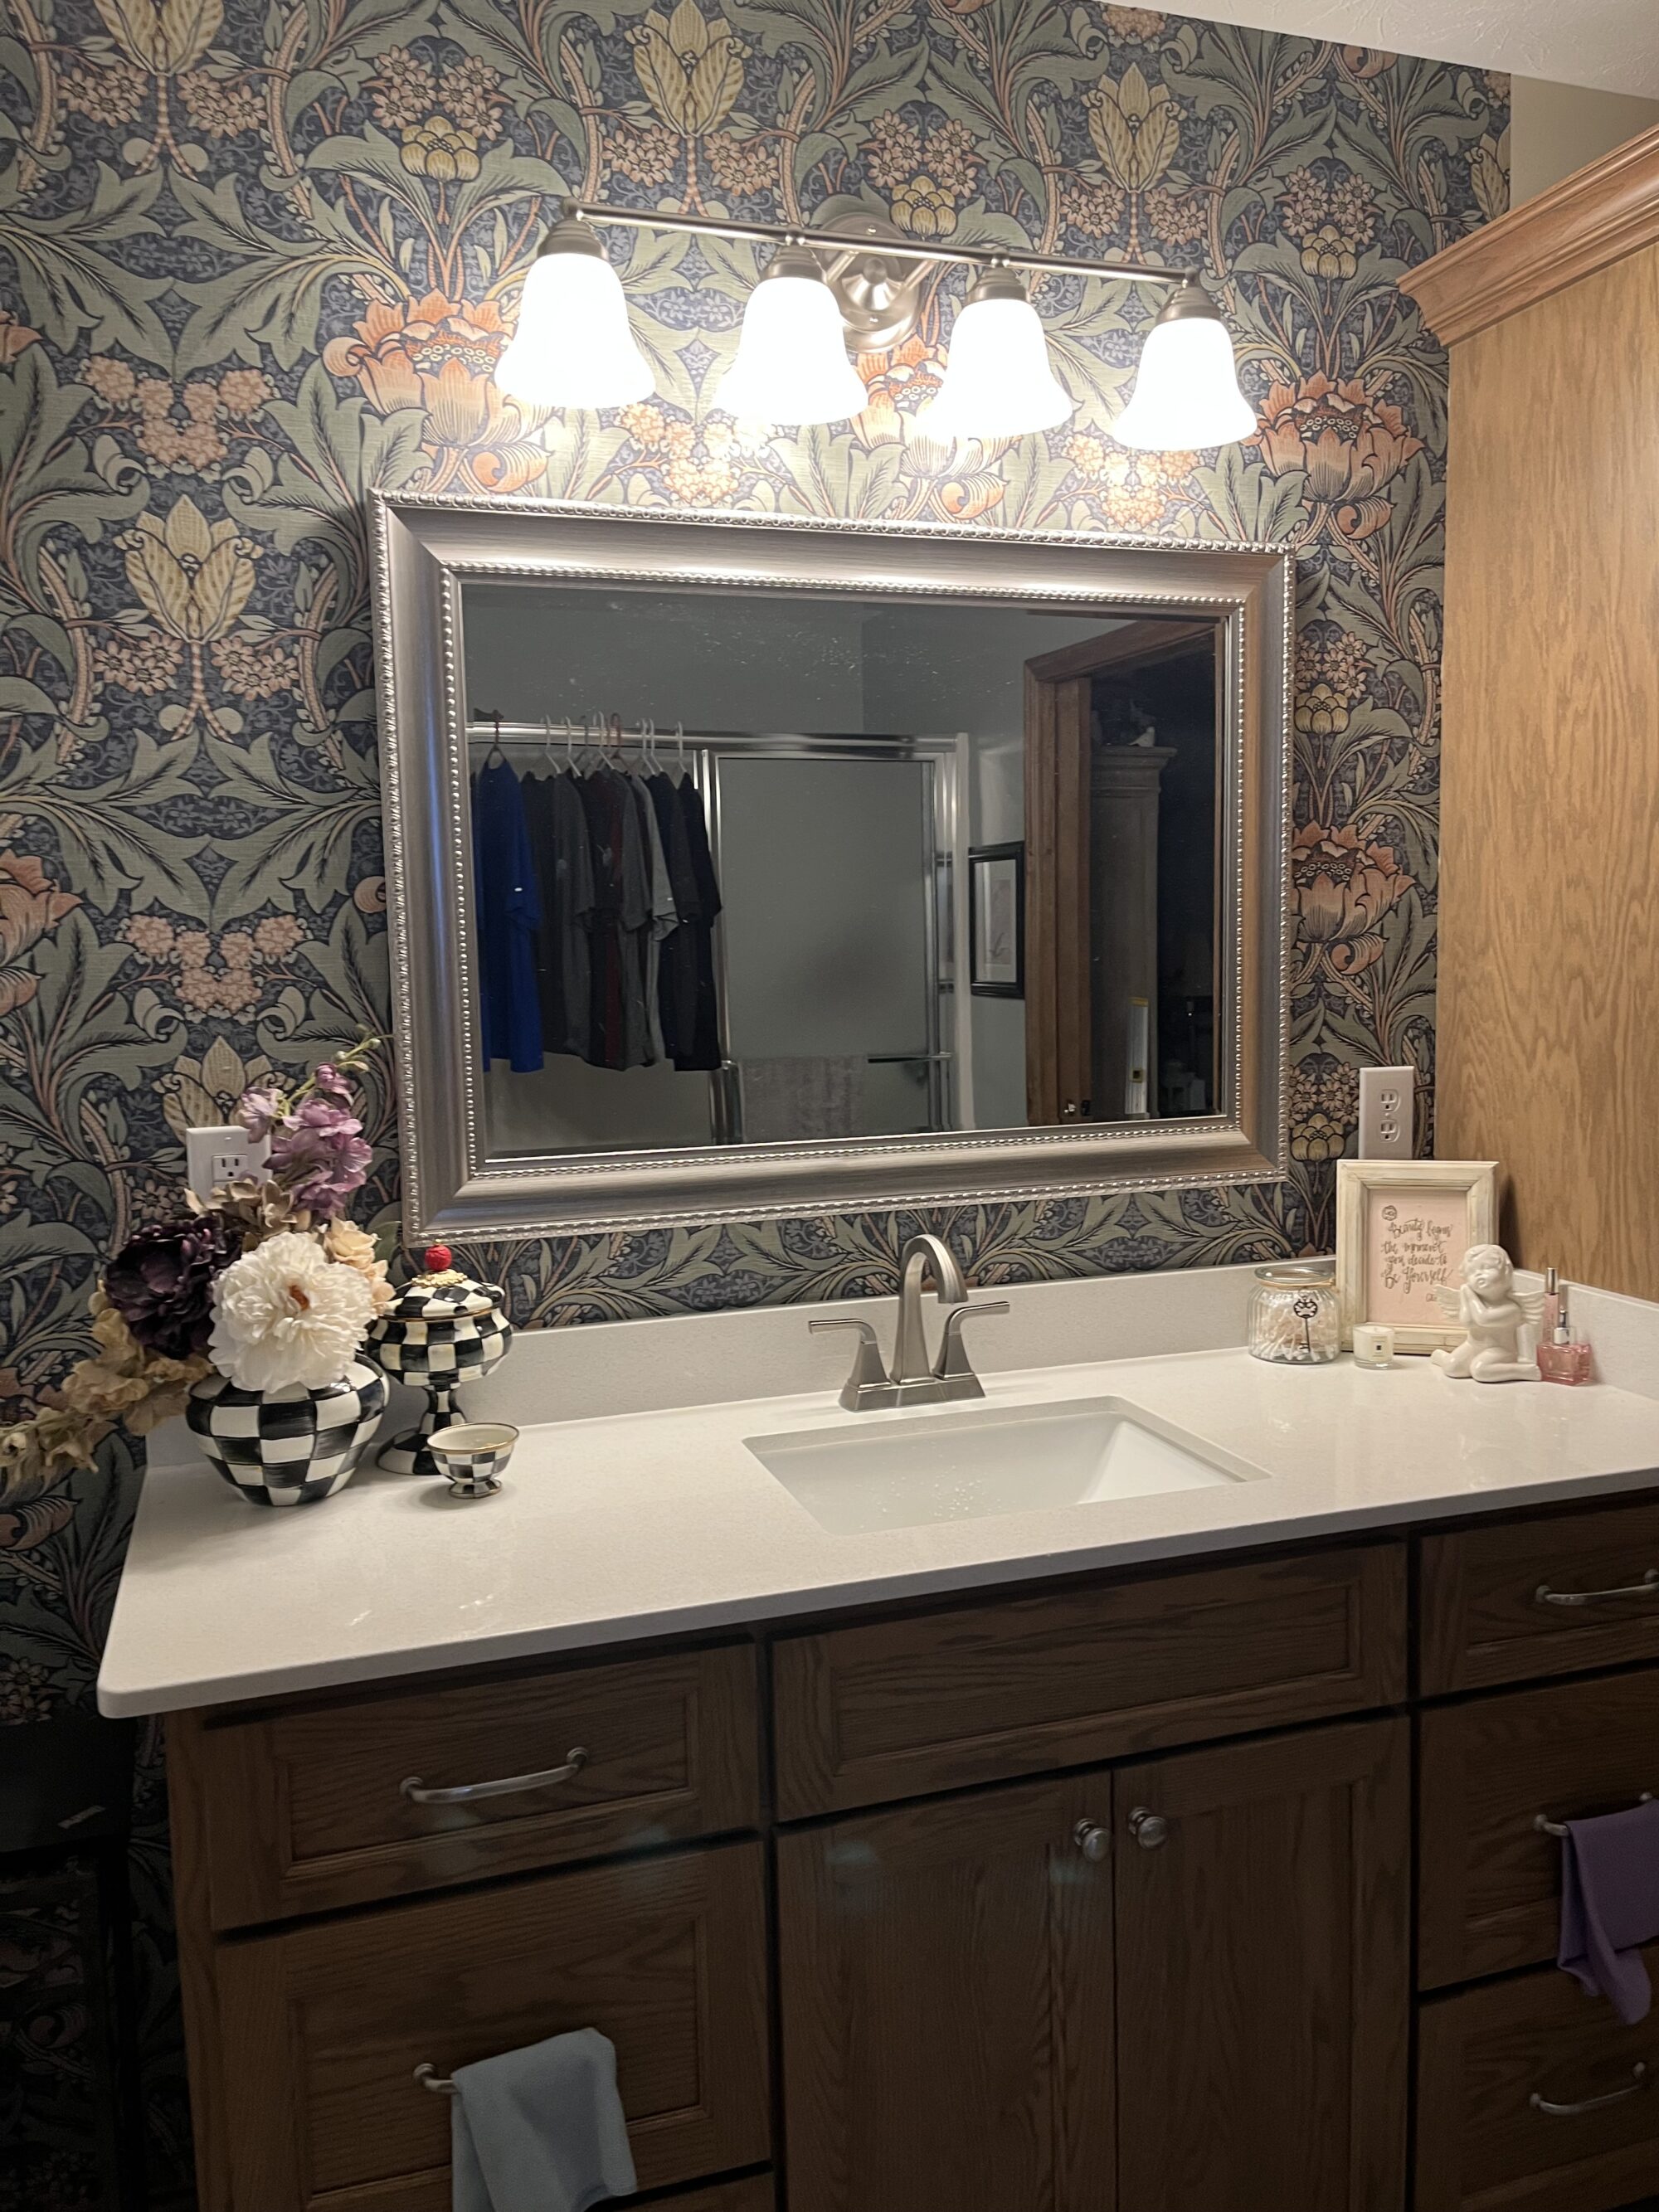
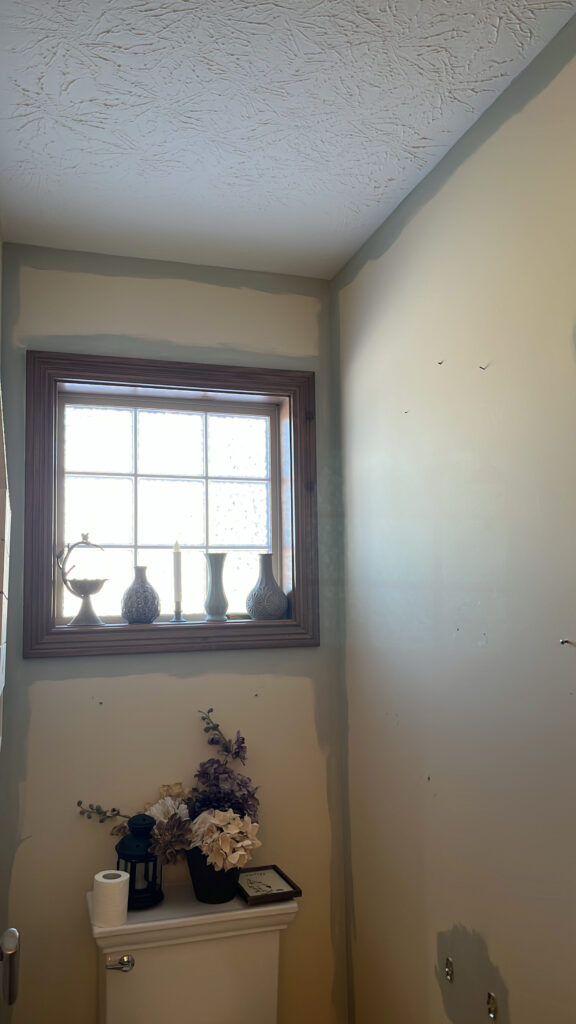
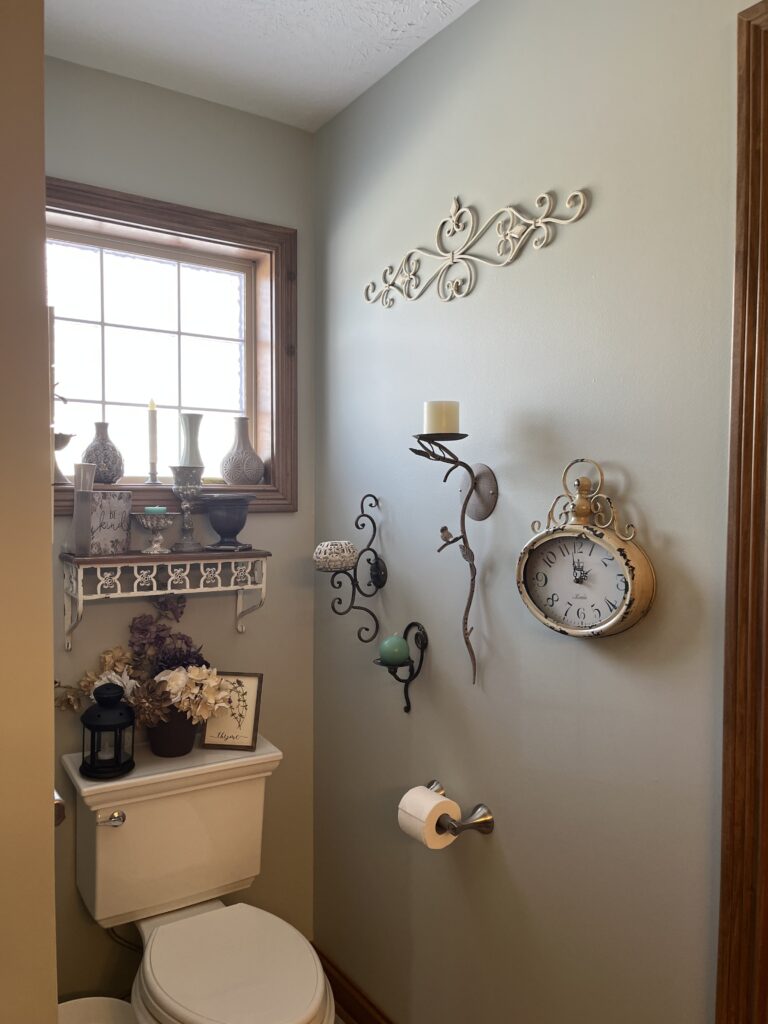
As you know, Nigel is not up to speed yet and really couldn’t do much beyond supervise (like a backseat driver supervise) the reno in the bathroom. You might recall (again, Nigel is cheap) we opted to have the whole house painted Sherwin Williams Antique White. We’d used it in a couple of different places in the Big House, but it had always been paired with SW Alabaster. When it’s all by its little old self, it’s very yellow and very boring! Now, I honestly don’t mind painting so I knew we would eventually be painting the rooms. I just didn’t realize how quickly because I couldn’t cover that Antique White fast enough. Also, contractors don’t use the best quality even if it is Sherwin Williams. The primary bathroom (other than the laundry room/my closet) was the last room to be painted. Our bedroom is Sherwin Williams Silvermist which is a warm green/blue/grey. Light doesn’t especially affect it that much as it’s westward facing and only has one window. I wanted something in the same hue, but a little lighter. Enter Silver Strand. Now, I don’t know how close they really are, but there’s a wall separating them. That was one good decision I did make. We put in a pocket door between the two.
More bathroom…
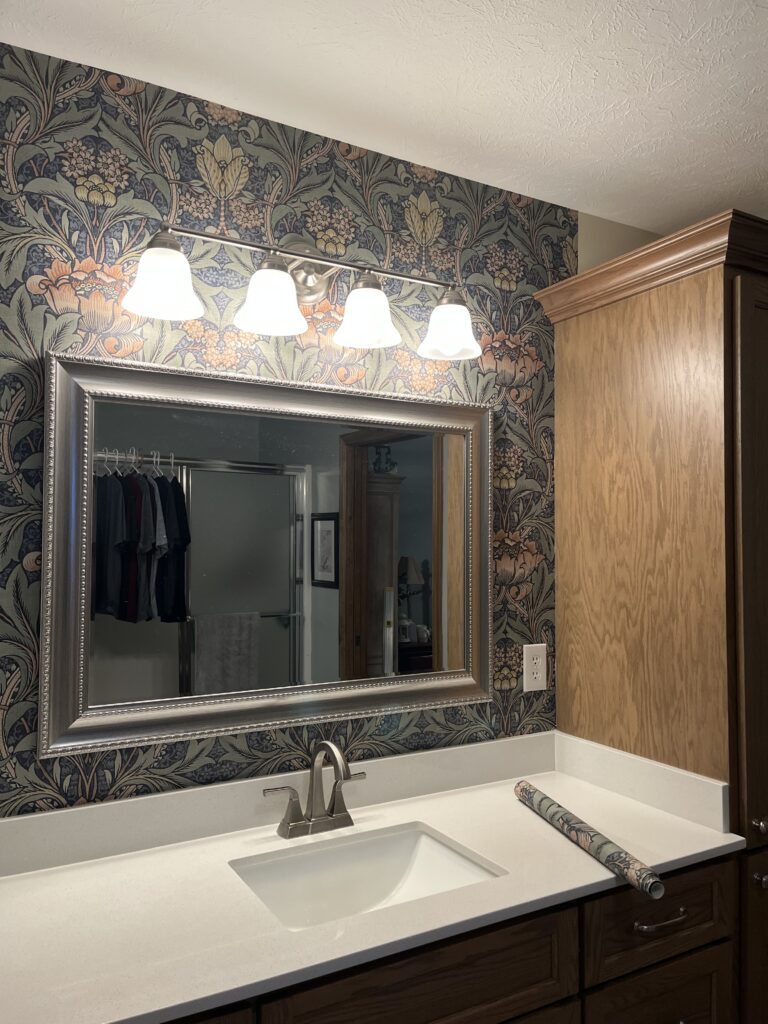
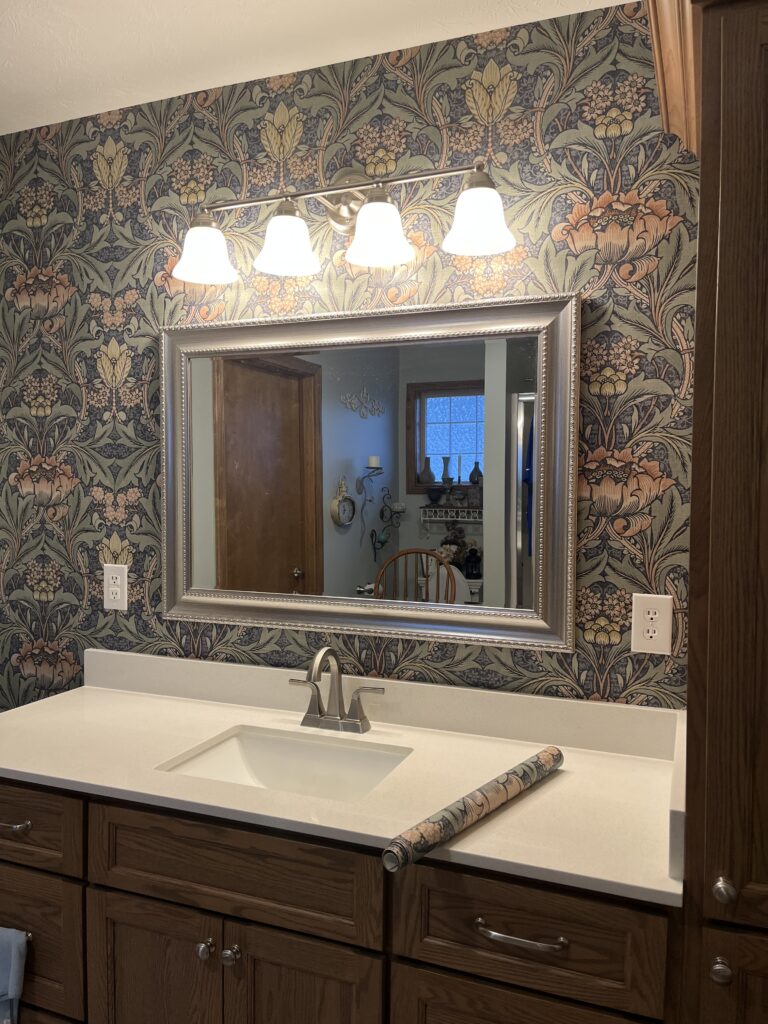
(Did anyone think “more cowbell?”) I knew I wanted an accent wall. I also know those come in and go out of style quite regularly. But, just like my clothing, I don’t really care as long as I like it! I had seen this wallpaper on Instagram or somewhere. Then, this summer, I was at one of my best friend’s house. She had put it in her powder room. I don’t know if it’s the same color or not. But, it’s peel and stick. Now, I have wallpapered a lot in my life. We had at least three different wallpapers in the full bath on the first floor of our house up north. And, there was a period in time when every room in that house was wallpapered. So, I’m pretty good at pre-pasted wallpaper. I’m also really good at removing it. This time around, though, I wanted to try peel and stick wallpaper. I watched YouTube videos, Instagram videos, read reviews, and read all about it. It sounded like something I could do fairly easily. The one thing most people said was you needed more than one person. Pfft! I didn’t need another person. I’m practically a pro!
A little more bathroom…
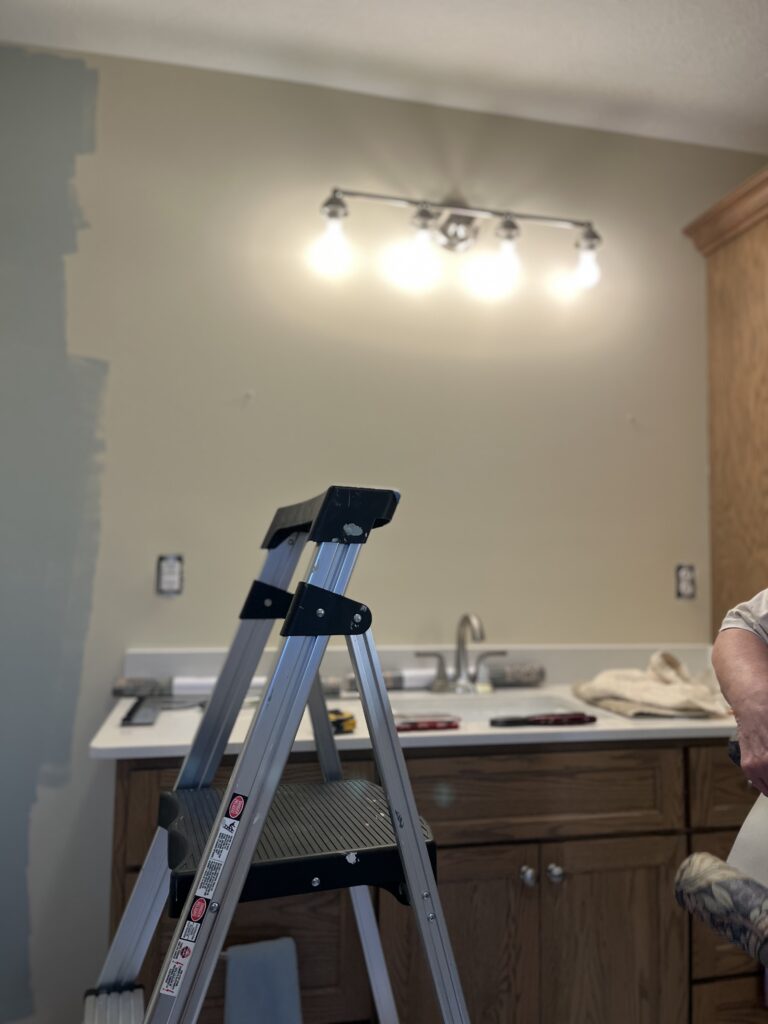
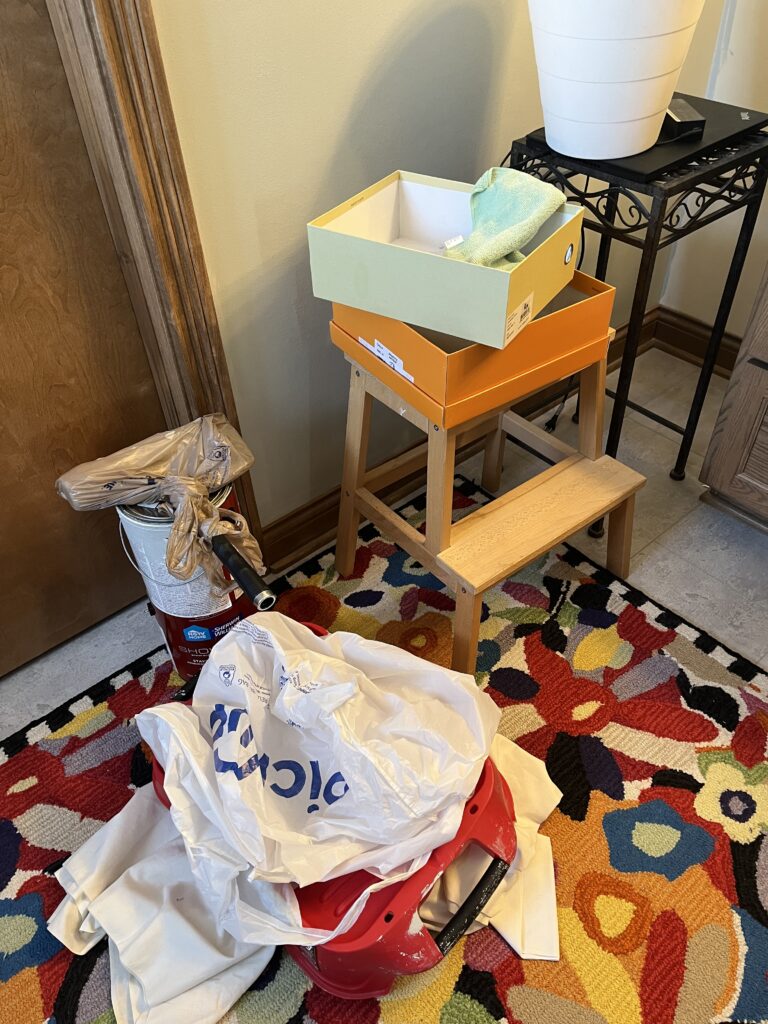
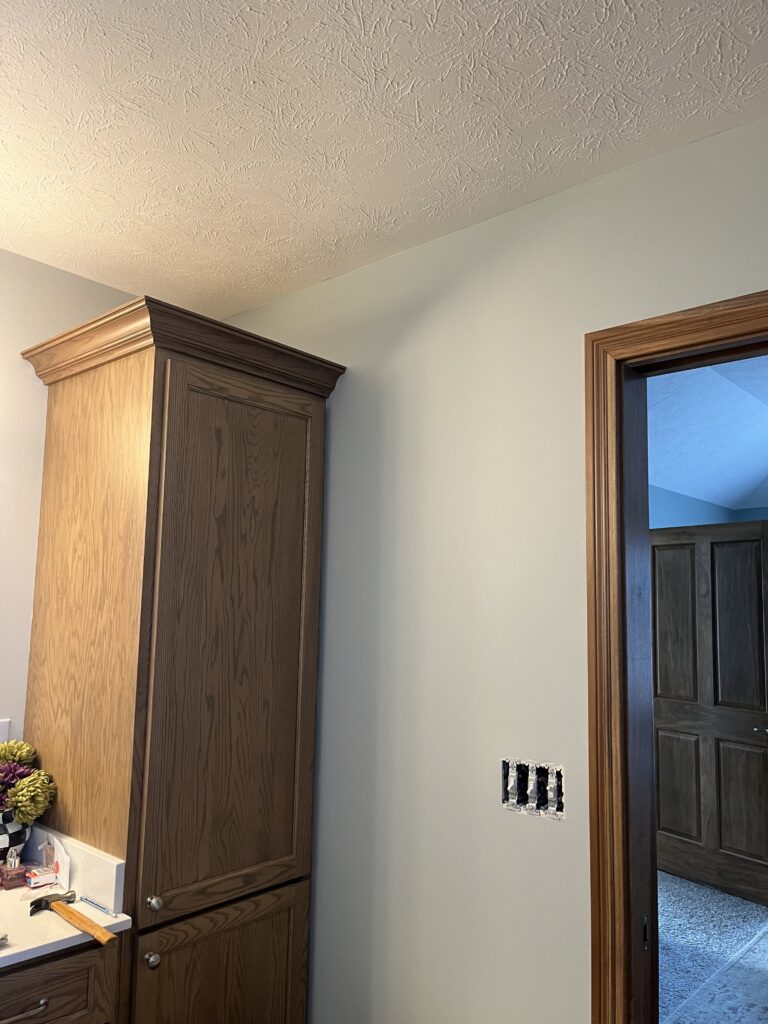
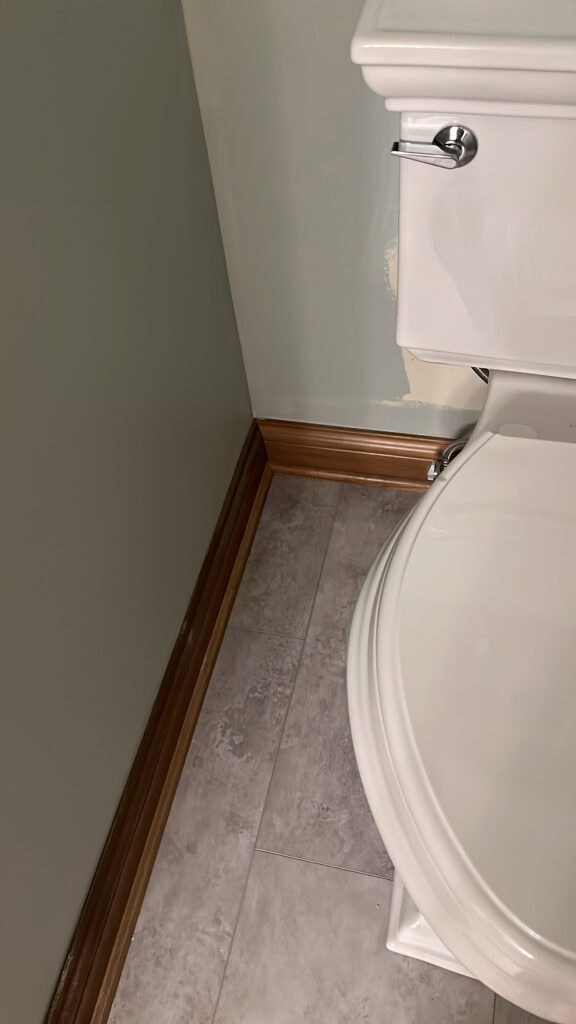
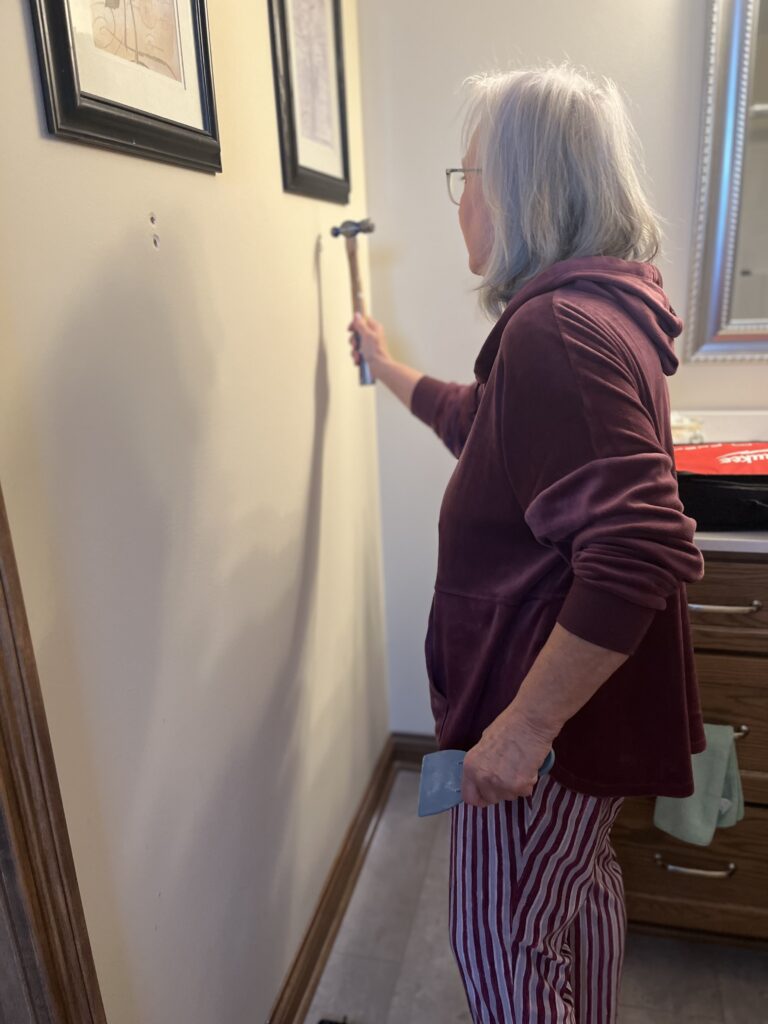
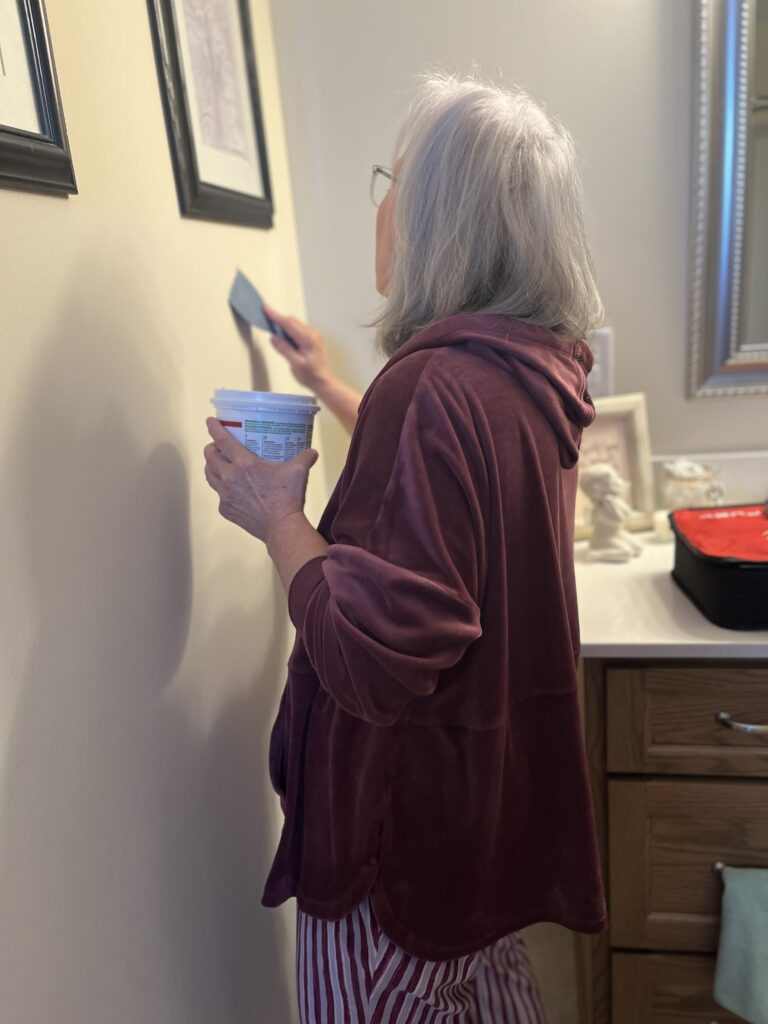
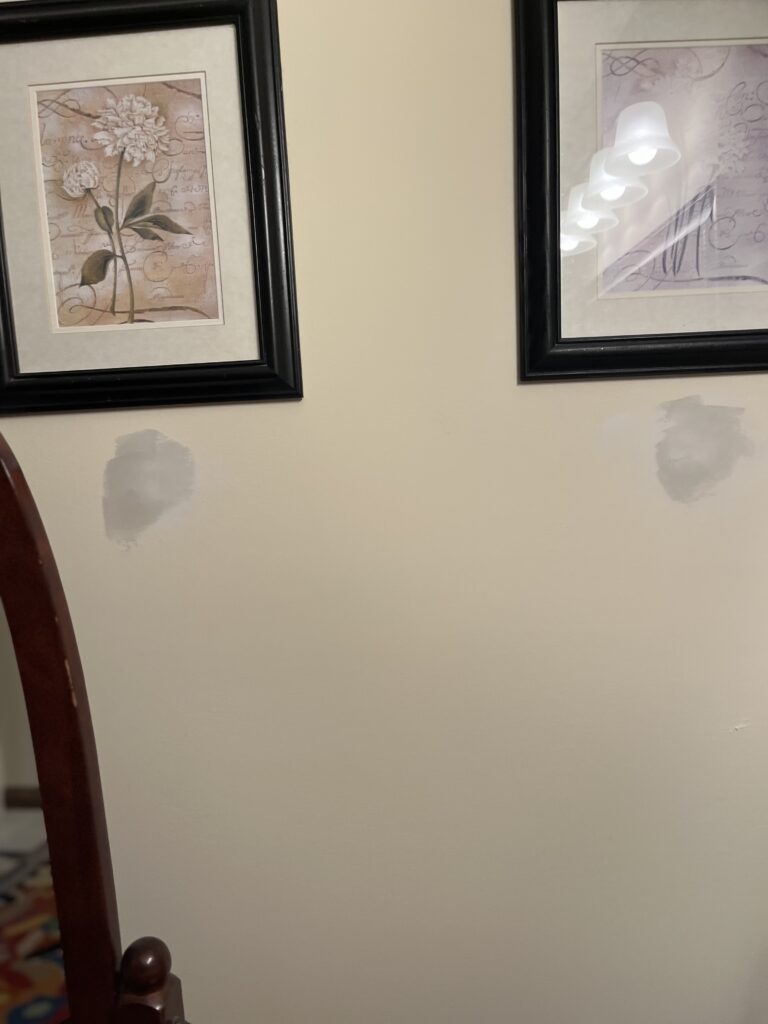
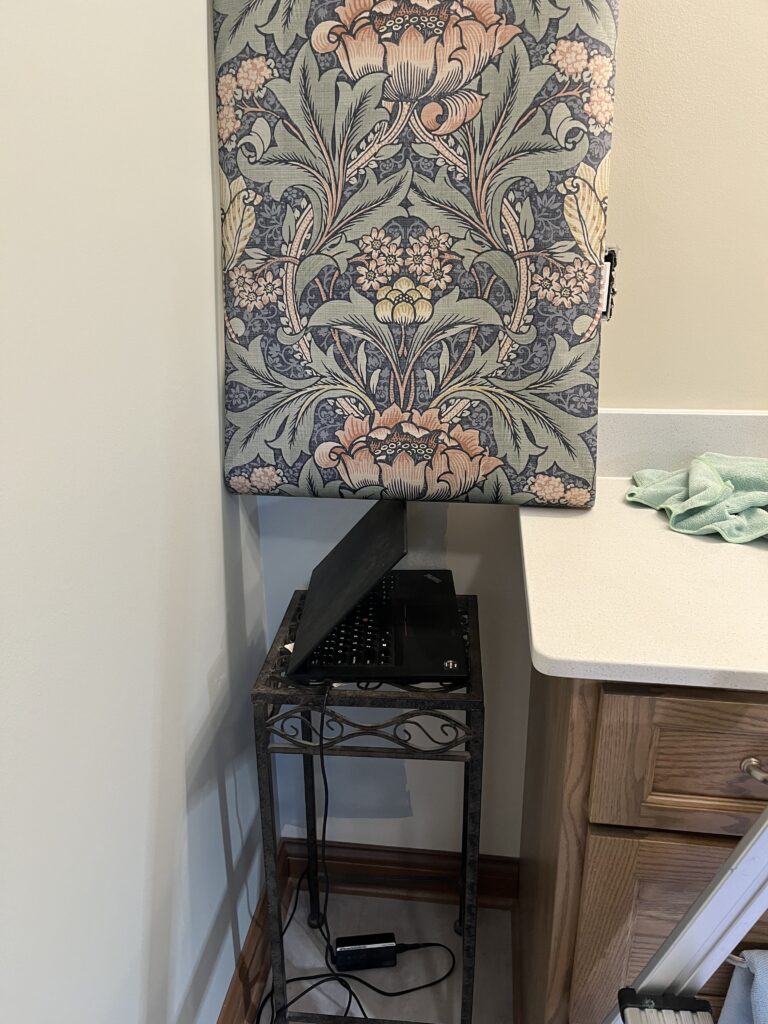
The first thing I had to do was remove the towel rack. I’m not sure why we ever installed one! It was clear on the opposite side of the bathroom from the shower and too far from the sink in the vanity. So, I used my Nigel’s impact driver and removed the screws and anchors. Then, I had to patch the holes. That took three coats of mud. In between, I had to sand them. Next up was removing all the decor from the walls. Some of it was screwed directly into the wall rather than hanging off nails. Finally, it was time to paint. I love to paint, and I’m usually a first rate cutter inner. This time, I had some tricky spots where I just kept messing up and painting the wooden moulding. I always got the paint off, but it kinda wrecked my mojo. In the corner by the vanity is a tall linen cabinet with crown moulding. That was not fun, either. But, I got it all done within two days.
The wallpaper…
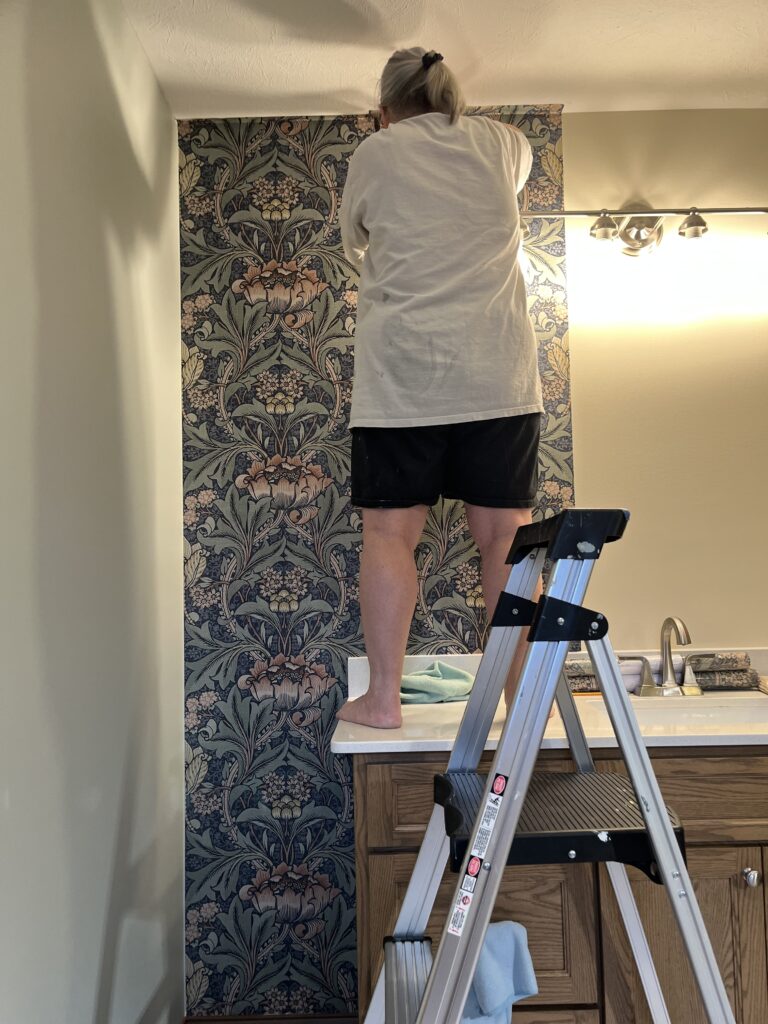
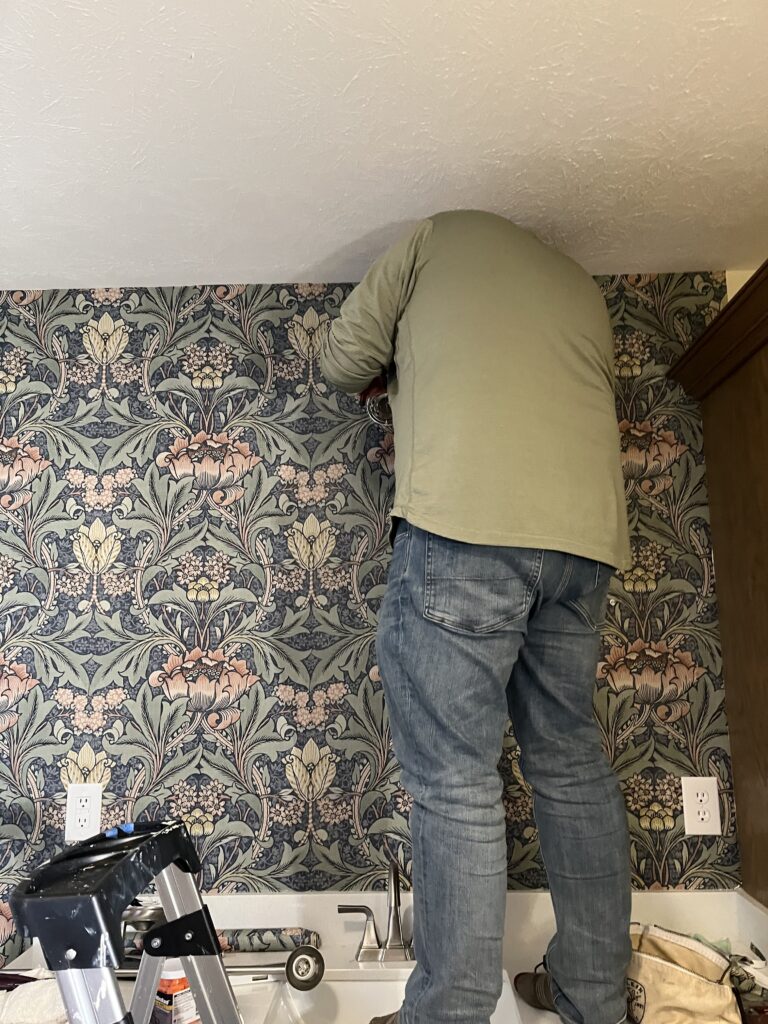
And, then it sat…for about two weeks as I worked up my courage to tackle that wallpaper. I’ve always used a plumb line and started in the middle of a wall. But, Nigel thought it best to start in the corner opposite the linen cabinet for a couple of reasons. It’s a relatively small space, and the true middle of the room isn’t the middle of the vanity. I went with his advice and started in the corner. Amazingly, it ended up with the pattern being just about perfectly set up in the middle of the room. I haven’t told him that yet! When you use peel and stick wallpaper, you need a really sharp utility knife. We couldn’t find the usual one (pretty sure Jack didn’t eat it, but he eats everything else). You also need something to smooth down the wallpaper. In the past, with pasted wallpaper, I’d used a special tool that resembled a really long putty knife. Of course, I couldn’t find it. But, I discovered a microfiber towel smoothed the wallpaper much easier. Many reviews talked about how thin peel and stick wallpaper is, but I didn’t find that with mine. I used my hand then to wipe over the surface of the wall to further smooth the paper.

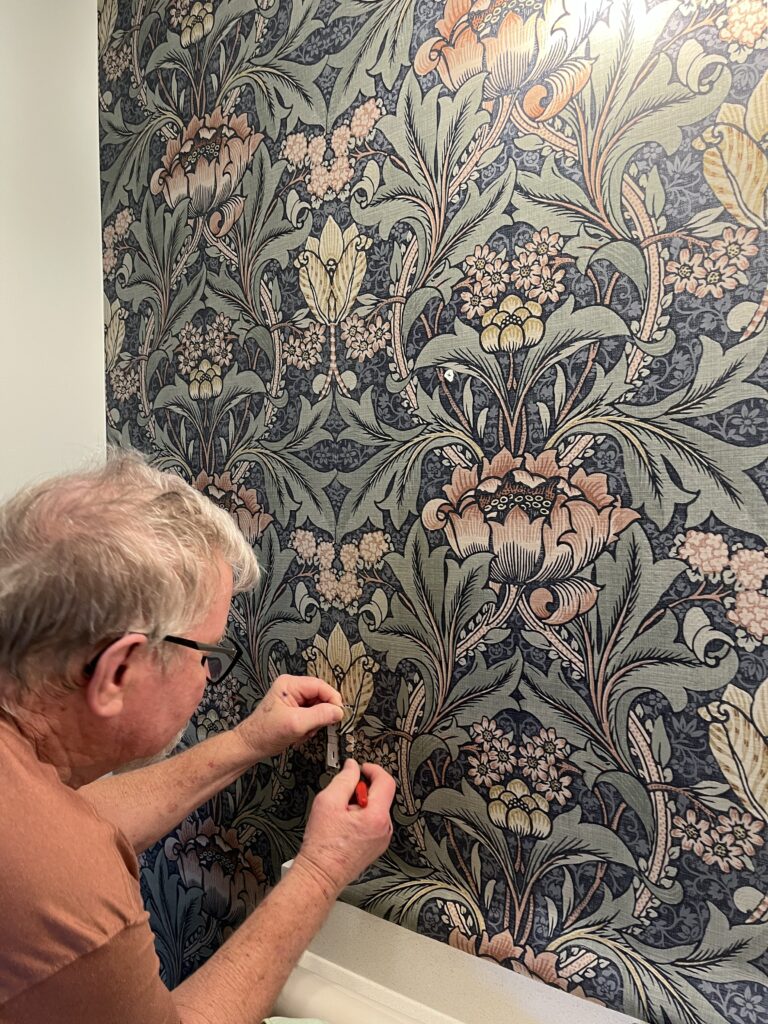
More wallpaper…
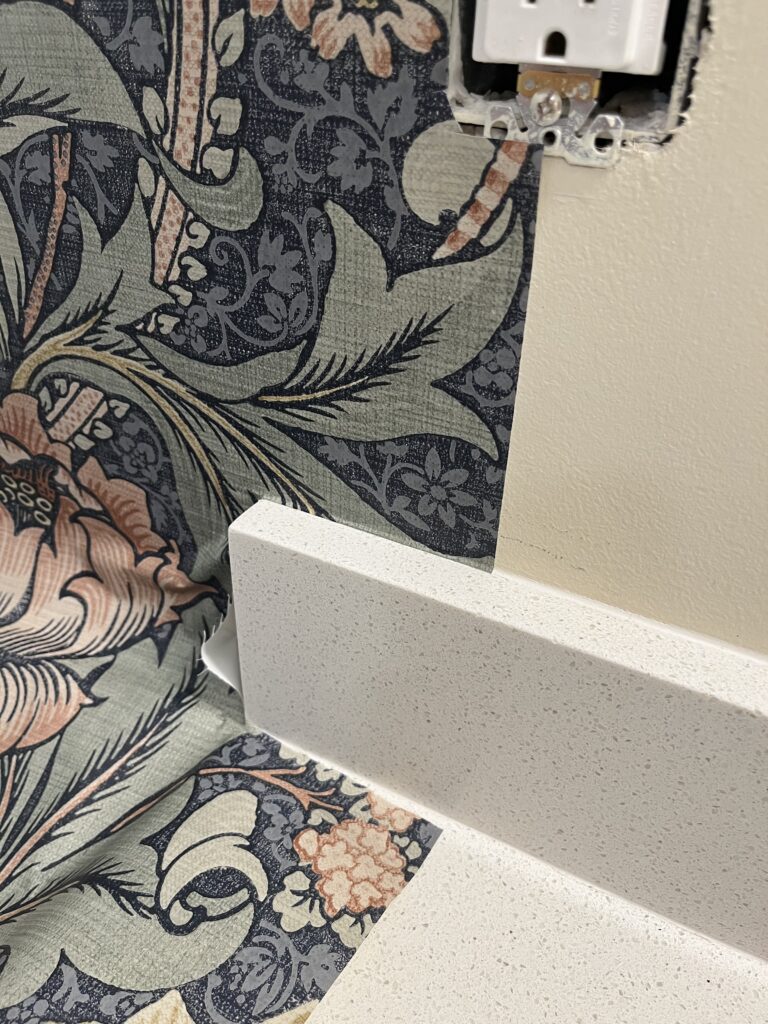
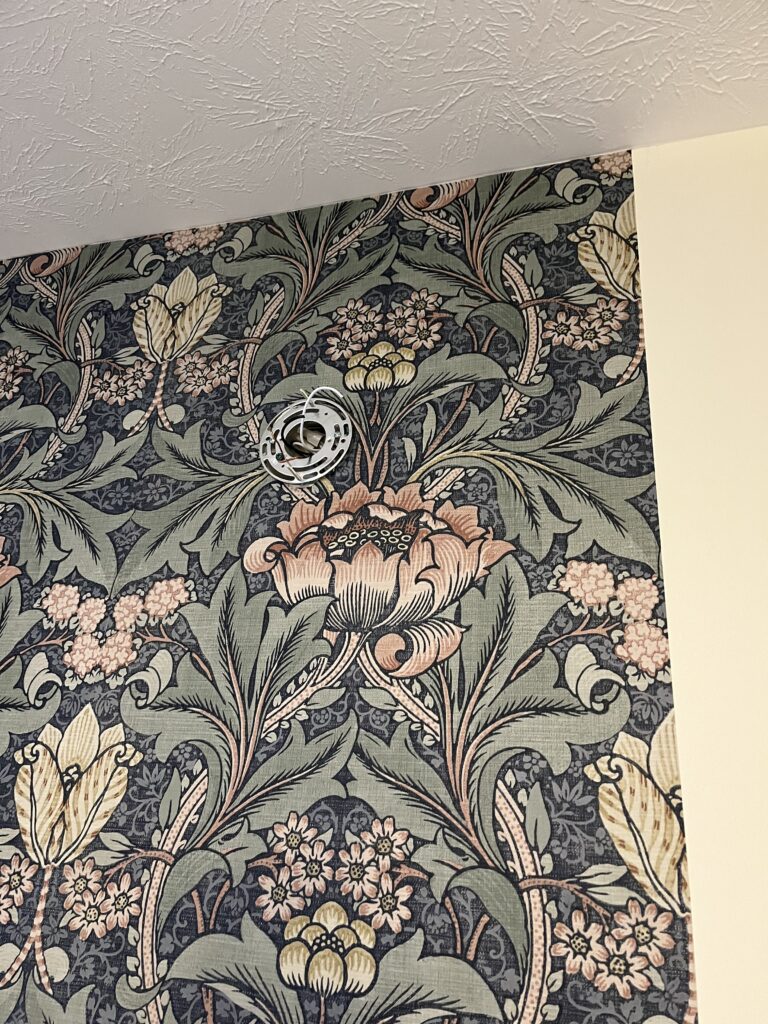
Now for the application…what you’ve all been waiting for, right? I measured the length of the wall and added a couple of inches. You begin at the top of the wall and pull the backing down about 10-12 inches. Place the wallpaper against the wall and smooth it with whatever tool you’ve decided to use. I always go an inch or so above where the wall starts so I can get a sharp cut once I’m done with that piece. You continue to pull the backing down and smooth the wallpaper. This works really well…until you come to an outlet or the top of the vanity! Then, you have to do some thinking. I had to cut out for the backsplash, then the vanity was inset even further. I ended up using scissors to make a rough cut out for the backsplash and was able to finish up that strip. The next strip went fairly easy with only the screw hole for the mirror to cut out. The third strip was where things went to h-e-double hockey sticks! The light had to come down at that point.
Electricity…
Nigel is an electrical engineer so he’s taught me to be scared of electricity. Well, he really didn’t have to do that, but he always made triple sure I had electricity off when he was replacing lights. I got the light off the wall easily enough. There are usually three sets of wires in a light: a white one, a black one, and a green or copper one. Here’s the rhyme you need to remember: Black’s hot; white’s not; green’s ground. So, I knew not to touch the end of the black wire or even touch it to the white one. The problem was the electrician didn’t use wire nuts when he installed the lights. He crimped the wires with some doohickey and then wrapped electrical tape around it. I couldn’t, for the life of me, get that doohickey off. Nigel couldn’t help and said to just cut them off. So, I did! I put up another sheet of wallpaper. The next one was the worst. I’d discovered the crown moulding at the top of the linen cabinet wasn’t flush to the wall so I could slide the wallpaper in behind it. Here’s the big problem with peel and stick wallpaper. It sticks to itself really, really well! You can get it unstuck (take it slowly), but it remains a little crinkled right there. I had so much trouble trying to get the right cuts around that linen cabinet and then pull the backing off and apply it and smooth it and…well, let’s just say the air got blue and I ripped that piece down and wadded it up and swore a little more! By this time, we both realized we needed reinforcements. Nigel called our oldest (who is making his blog premiere, I do believe) who came down to install the light. By the time he got to our house, I had that &^%$ piece up. You can see, in the photos, that there’s a piece missing over the linen cabinet. Don’t worry. I got that up after taking the pretty photos! Nigel didn’t want to wait until the next day even though I was pretty well done.
Wrap it up, Marsha!
I am in love with my new bathroom! If I had the space, I’d put a nice chair in there and use it as my escape place. But, even though it’s stupid big, there’s no place for a comfy chair. I do have a cute zebra print bench. I always say never say never, but I am pretty sure I won’t be using peel and stick wallpaper ever again…though I do still need to do something in the laundry room! So, can we talk? Are you into DIY? How do you feel about wallpaper in general? Have you ever used peel and stick wallpaper? Please leave me a comment or two, and we can talk. I promise to respond as quickly as I can.
Thank you!
I want to thank all of you from the bottom of my heart for reading, commenting, subscribing or emailing! It truly means so much to me! If you’d like to follow me on Instagram, you can find me here.
Affiliate links, discount codes and such:
Just a reminder that Marsha in the Middle may use an affiliate link. Those links are usually italicized. If you click or make a purchase from an italicized link I provide, I may receive a small commission at no cost to you. Thank you for your support. Use Marsha12 for 12% off any order of $65 or more at Buykud. I have also become a Halftee Partner. Use the code, MARSHA2098, for 20% off any purchase. I am also an affiliate with Clara Sunwoo. You can use my code, MARSHA10, for 10% off your entire order. In case you didn’t know, bloggers must disclose the use of affiliate links. That’s why I include this in each post.
Where you can find me:
Linking up with Nancy’s Fashion Style, Fine-Whatever, Is This Mutton, Shelbee on the Edge, Chez Mireile, Suzy Turner, and Away from the Blue as well as Deb’s World and A Fresh Cup of Coffee. I also link up with This Blonde’s Shopping Bag, Doused in Pink, I do deClaire, Mummabstylish, Style Splash and Elegantly Dressed and Stylish as well as the Senior Salon Pit Stop (Esme’s Salon) and Slices of Life. Please check out these wonderful ladies and their blogs! I also am a co-host for Ageless Style on the third Thursday of the month and Songful Style on the last Monday of the month. I co-host Traffic Jam Weekend every Thursday with Melynda, Lisa, and Sue. I also host Final Fridays on the last Friday of the month as well as 10 on the 10th on the 10th of the month! I do hope you’ll check out all of these blogs and link parties!
And again this post took the time off eating my breakfast, so now i have to run to the gym! Wallpaper on in the bathroom?? We don’t do that here. But I have to say, it looks very good!
Hahaha!! I have taken to reading your comments to Mike because they make me smile! I have wallpapered lots of bathrooms and torn it down only to do it again! What can I say…I like change!
Thanks, Nancy!
You did a great job, love the wallpaper design.
Thanks, Rosie! I love it, too!
Your bathroom looks lovely and I really like that statement wall. I do a lot of household projects myself but I have never used wallpaper; that said I use paint to make accent walls and add designs and things.
Thanks, Joanne! I have wallpapered for years but didn’t do any at our last house. We relied on different kinds of wall treatments to create interest. If that house had had a bedroom/full bathroom on the first floor (or even been able to create one), we would have stayed there. I’m sure the painting you’ve done has been amazing. You have so much talent!
Wow Marsha! The wallpaper looks amazing and you are quite the DIY-er!
Our house is an open concept and I don’t like it either. Of course we have lived here almost 30 years and if I knew 30 years ago that this would likely be my forever home I may have made some different decisions! I’d love to move to a traditional style home with a big front porch. Oh well, I can dream!
xo,
Kellyann
Thanks, Kellyann! I’m pretty good at regular wallpapering, but this peel and stick was almost too much! Like I said, the air was blue a few times! You are the only person I’ve ever met who has disliked open concept, too. Our house up north would have been something you would have liked. We had a front porch that was the length of the house and seven feet wide. Then, we had a back deck, also the length of the house and was six feet wide. That one was cedar, and the front one was concrete. We had six beautiful posts on the front porch. The kitchen and dining room were kinda one room, but there was a partial wall dividing them. You definitely couldn’t see into the kitchen from the great room. The primary was downstairs, and the kids’ bedrooms were upstairs. It was an amazing house that I still miss.
I love the drama the wallpaper creates! It looks so good! Your mirror really looks good against it too!
Thanks so much, Laura! I always think of your black ceiling and would love to do that somewhere. It’s just so cool! I was thinking gold or bronze would have looked really good with this paper, but I wasn’t replacing everything!
I LOVE it!! I think it is so dramatic and fabulous!! I have a wall that we wallpapered in my office and I just think it really adds something to the room. The trainer this week even told me during the zoom this week that she loved my wallpaper! Lol. I am a fan and I think you did a great job!
Thanks, Erin! It is dramatic…that’s the perfect word! Usually, I don’t wallpaper an accent wall, but I also knew I didn’t want to do the whole room with this. It may have been a little too dramatic! That is really cool your trainer noticed your wallpaper! I don’t think I’ll be doing any Zoom calls in the bathroom, though!
You did a great job and I love that wallpaper, it’s beautiful!
I’m terrible at DIY of that kind. No one ever really showed me how to do those things myself, I was always kept in assistant status 😉 Now I wouldn’t be able anymore to do something like it because of health issues, dizziness for example.
Cat
https://catswire.blogspot.com/
Thanks, Cat! I forgot to mention this was actually the second wallpaper I ordered. The first one was the same print but a very neutral color scheme. I was afraid the one I wanted (and eventually got) would be too dark. It is a little dark, but it’s also a lot moody which I love. I’ve almost always taken the lead on wallpapering because Mike hates it. But, he’s had to teach me several things since his hip problem. Oh, I had a bout of vertigo several months ago. That is the weirdest thing. I would even have it lying flat on my bed which is even worse! It happened when I had my hair cut, and I’m sure my stylist probably thought I’d had a nip or two before coming to the shop!
Love the wallpaper, Marsha, and the story you told. It’s so hard to anticipate exactly what you want or need when working solely from plans. I love our floorpan but would make a few changes, if I could. So for our next house…LOL I know exactly what I would do. Have a great week.
Lynne
Thanks, Lynne! It’s really hard to “see” what is being built. Once the studs were in, and I could see it, it was too late. Even then, I didn’t anticipate certain things…like how dark the house is with only a few windows (the last house had 17). The one thing that just drives me batty is the door to the back porch/patio is directly across (as in straight across) from the door into the primary bedroom. I didn’t notice it on the blueprint nor did I really notice it as they were building it. But, a woman would never have designed something like that. The door to the bedroom could have easily been offset a few feet and made a big difference. I’m afraid there’s no next house for us. Nigel says no more moving! But, there are a couple of condos in the neighborhood with second stories, so I’m saying never say never to that!
Oh wow, you are handy as they say in the UK. Wallpaper in the bathroom is not usually found in UK houses which btw, are rarely newly built and if they are usually not well built. In fact I’d say new builds have a really bad reputation. The best house are always the older houses. They’ve lasted over 100 years and will last another 100!
But my goodness, well done you – you did such a great job!
Thanks, Penny! I love to do things like this, but I am usually the sidekick and not the project manager as well as laborer! The town we live in has so many new builds, many of which are “built” in factories, shipped to site, and then assembled. Our last house was like that, and it was really well built. The finishing wasn’t so great which is one of the reasons we did so many DIYs there. Our second house was over a century old, but it didn’t fit our growing family.
Marsha, you are a woman of many talents! Very impressive! I think wallpaper is making a comeback (but who cares — I’ve always loved it). The pattern you selected is gorgeous and makes your bathroom so elegant-looking! Well done!
Thanks so much, Beth! I think you’d be surprised at the things I’ve helped Nigel do. This was my first almost all me project. I have always loved wallpaper. Nigel does not…probably because I change my mind frequently. I’m not sure I’ll do much more wallpapering in this house. Some houses seem more fitting for it than others. I really love my bathroom now and wish I could put a chair in there. It’s big but not laid out to accommodate a comfy chair.
That’s really pretty wallpaper and looks great as a statement wall! I like open concept pretty well and my husband loves it. I am over 50 and have never owned my house, so my DIY experiences are quite limited. But man, I still remember the approximately 8 million years it took me to remove this wallpaper in our house when I was a kid; I think maybe that has done me for a lifetime with removing wallpaper (to be fair, modern wallpaper is quite different).
Thank you, Sally! I’m not sure where I first saw it, but it definitely gave me William Morris vibes. I was considering doing a color drench in there which means you paint all the walls and ceiling the same color. But, the ceiling has never been painted which means it would have just soaked in the paint. And, I’m definitely no Michelangelo so no ceiling painting for me. Our last house had an open concept but the kitchen was really big with a huge island. So, it felt like there was a bigger disconnect between the living room and kitchen. It doesn’t help that the sink is in the island now. That’s what I really dislike…having dirty dishes on the island. I use the dishwasher at times, but we usually run out of dishes before it’s full! Yeah, removing wallpaper isn’t fun at all. We finally bought a Paper Tiger as well as a steamer. This will probably be the only peel and stick wallpaper I use. I may wallpaper in the laundry room, but I’ll use traditional paper. I think it’s more user friendly.
I love your wallpaper choice, Marsha! It really compliments the woodwork, too! I always get a bit intimidated when installing wallpaper and haven’t done it in a long time. We have a BIG wall at our lake home that needs to be tackled and you may have inspired me! Time will tell!
Thanks so much, Laura! I was hoping it wouldn’t be too dark against the wood, but I love the way it turned out. I love wallpaper, but Nigel really hates it! This time, he just had to listen to me swear at it! I have a roll left and can’t decide whether to return it or use it in the laundry room. Good luck with your lake home wall if you do it!
Wow, wow, wow!!
Truly spectacular!!
Xoxo
Jodie
Thanks, Jodie! I love it!
I love how it turned out, Marsha! The wallpaper print is beautiful! We used peel and stick on a small accent wall in our family room, and it was a nightmare. When I did our daughter’s/guest room, I used adhesive, and it was much easier to work with. Your bathroom looks so good!
Jill – Doused in Pink
Thanks, Jill! I agree with you on the peel and stick vs adhesive. Maybe it’s that I have always used the other kind, but the peel and stick was not pliable at all. The good thing was it stayed sticky. The bad thing was how sticky it was when it got stuck to itself. I just love going in there because I love the vibe!
I am very impressed with your DIY skills . The wallpaper looks lovely , your bathroom must be very well ventilated , I would worry about moisture in mine. You are a woman of many talents.
Thanks, Jill! It is very well ventilated on top of being really big. I was a little worried about the paper sticking. I guess time will tell with this kind though I’ve never had problems with it in other bathrooms. I think I’m just a jack of all trades!
I was in two mind about wallpaper, but this transformation is stunning, has nudged me towards going for it for sure
Thank you, Pooja! I love wallpaper, but I don’t like taking it down. I’ve done a lot of putting it up and taking it down so I was eager to try peel and stick. I think, after the experience, I prefer the old-fashioned kind. I just found it easier to work with! Good luck on yours!
It looks great! I never try DIY. I just know I’d fall apart trying. Ha!
Hahaha!! I bet you wouldn’t! But, then again, I can’t imagine even beginning to write a book!
Thanks, Lisa!
I have never papered and doubt I ever will. Seems very complicated and I have trouble just using Scotch tape. I would have wallpaper stuck on everything everywhere. Your bathroom is a work of art. The wallpaper is magnificent. I think it should be inspiration for an upcoming SIA. Love the colors and the color of the walls. Enjoyed seeing you kids in action. Great teamwork.
Thanks, Leslie! I love to wallpaper. Mike does not. We had this really long narrow bathroom in our home up north. It didn’t have any natural light and was just so difficult to do anything. I honestly cannot remember how many times I wallpapered it. One paper was literally hypnotizing. You would be sitting there doing your business, and if you looked too long at the wallpaper, you’d get a little mesmerized. One time, I did the opposite of what many do in the bedroom…wait…that sounds wrong! What I mean is I took one wallpaper up high and then used the coordinating paper for the last three (or so) feet. I really liked it, but Mike got tired of it. I could go on and on! I don’t know that I will ever use peel and stick again. I didn’t find it as easy as traditional wallpaper. That could also be because I’d used that kind so much.
I watched you progress on Insta and was so impressed! This wallpaper is gorgeous. I would love to do something similar in my powder room. Thanks for sharing all your steps!
https://www.kathrineeldridge.com
Thanks, Kathrine! I am thrilled with the way it turned out. It’s exactly what I was envisioning…maybe even better. I am not sure I’d use the peel and stick ever again, but it was fun trying it!
It was really interesting to read your process! I am a diy as in I have ideas and my husband makes them come true. We are currently working on our new game room (MIL old room) and it really is coming together. I just got back her old mirror (which needed the mirror replaced) and that should be put up this weekend. We need a large vintage like poster and the walls will be all done. Hubby painted them, he had a hard time envisioning things, but he did what I suggested and he loves it too!
http://www.chezmireillefashiontravelmom.com
Thanks, Mireille! We are usually a team with me coming up with the ideas, Mike figuring out how to do it, and we both work together to finish it. I’m glad you’re able to repurpose your MIL’s room with a place that will be filled with laughter and love.